
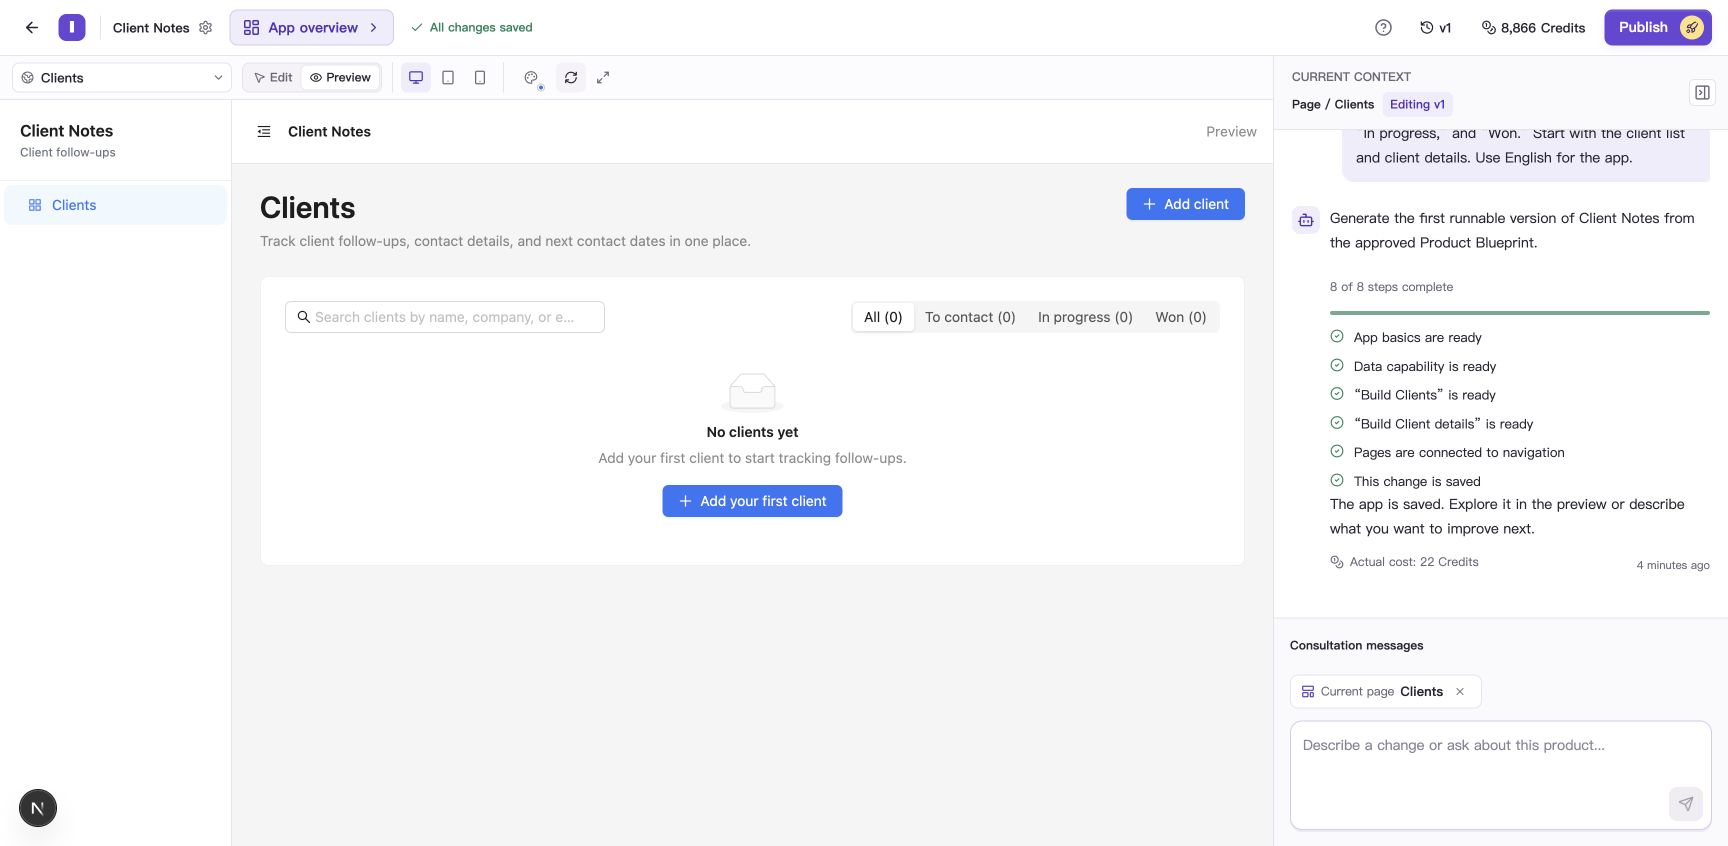
You have an idea for an app. Perhaps you want to keep track of clients, organize bookings, or give customers a simple place to check their projects. You understand the problem and can imagine something that would make the work easier. What you are less sure about is how to build it.
An AI app builder lets you describe what you need in everyday language, generate a first version, try it, and request changes without writing the code yourself. You still decide what the app should do and whether the result works for your users.
This guide follows that process in IdeaMade, using a client follow-up tool for freelance designers. We will build a web app that opens in a browser, starting with a small task and working toward a version someone can use.
The path is straightforward: describe the idea → review the Blueprint → generate the app → try it → improve it → publish.
1. Start with one task you want to make easier
Imagine you are a freelance designer. Client details live in a spreadsheet, project conversations are scattered across messages, and you sometimes forget who is waiting for a follow-up.
Your first thought might be:
I want an app to manage my clients.
That is enough to begin. To give the first version a useful direction, explain what you want to accomplish during a normal working day.
For this example, the outcome is simple: open the app, find a client, see the latest notes, and update the follow-up status after a conversation.
The first version needs a client list, client details, and a way to add and edit records. Search and status filters help you find the right person. Invoicing, automatic email reminders, and a client-facing portal can wait until you know the basic tool is useful.
Before submitting your idea, write down four things:
- Who will use it: a freelance designer managing their own clients.
- What they need to do: add clients, record notes, update statuses, and find records.
- What information matters: name, company, contact details, status, and notes.
- What can wait: payments, automated reminders, and team collaboration.
A focused first version gives you something concrete to try. If you are still choosing the main workflow, our guide to planning an app before you start building walks through that decision in more detail.
2. Describe the app in everyday language
Open IdeaMade and choose Create a Blueprint, or select New Project if you are already in Builder. Describe the app in the same terms you would use to explain the work to a colleague.
For our example, you could enter:
Create a client follow-up tool for freelance designers called “Client Notes.” I want to add and edit clients, recording their name, company, contact details, follow-up status, and notes. The client list should support name search and filtering by “To contact,” “In progress,” and “Won.” Start with the client list and client details. Leave automatic reminders and payments out of the first version. Use English for the app.
This request gives the AI a purpose, a user, the information to keep, and several actions to support. You do not need to choose a programming language, design a database, or specify how the search should be implemented.
Include any business rules you already know. If the app will have several users, explain who should see which records. If a booking needs approval, say who approves it. Those choices affect the experience people will have.
You can leave undecided details open. The Blueprint gives you a place to review the AI’s interpretation before moving into the build.
3. Review the Blueprint and correct the important details
IdeaMade organizes the request into a Product Blueprint, covering the product goal, users, pages, data, workflows, and product decisions. Page sketches help you understand the proposed structure.
Read it as a description of the product you want to create. For Client Notes, check that it includes adding and editing clients, the three follow-up statuses, name search, and filtering. Check that the roles match the intended users and that the first version stays focused on your own client records.
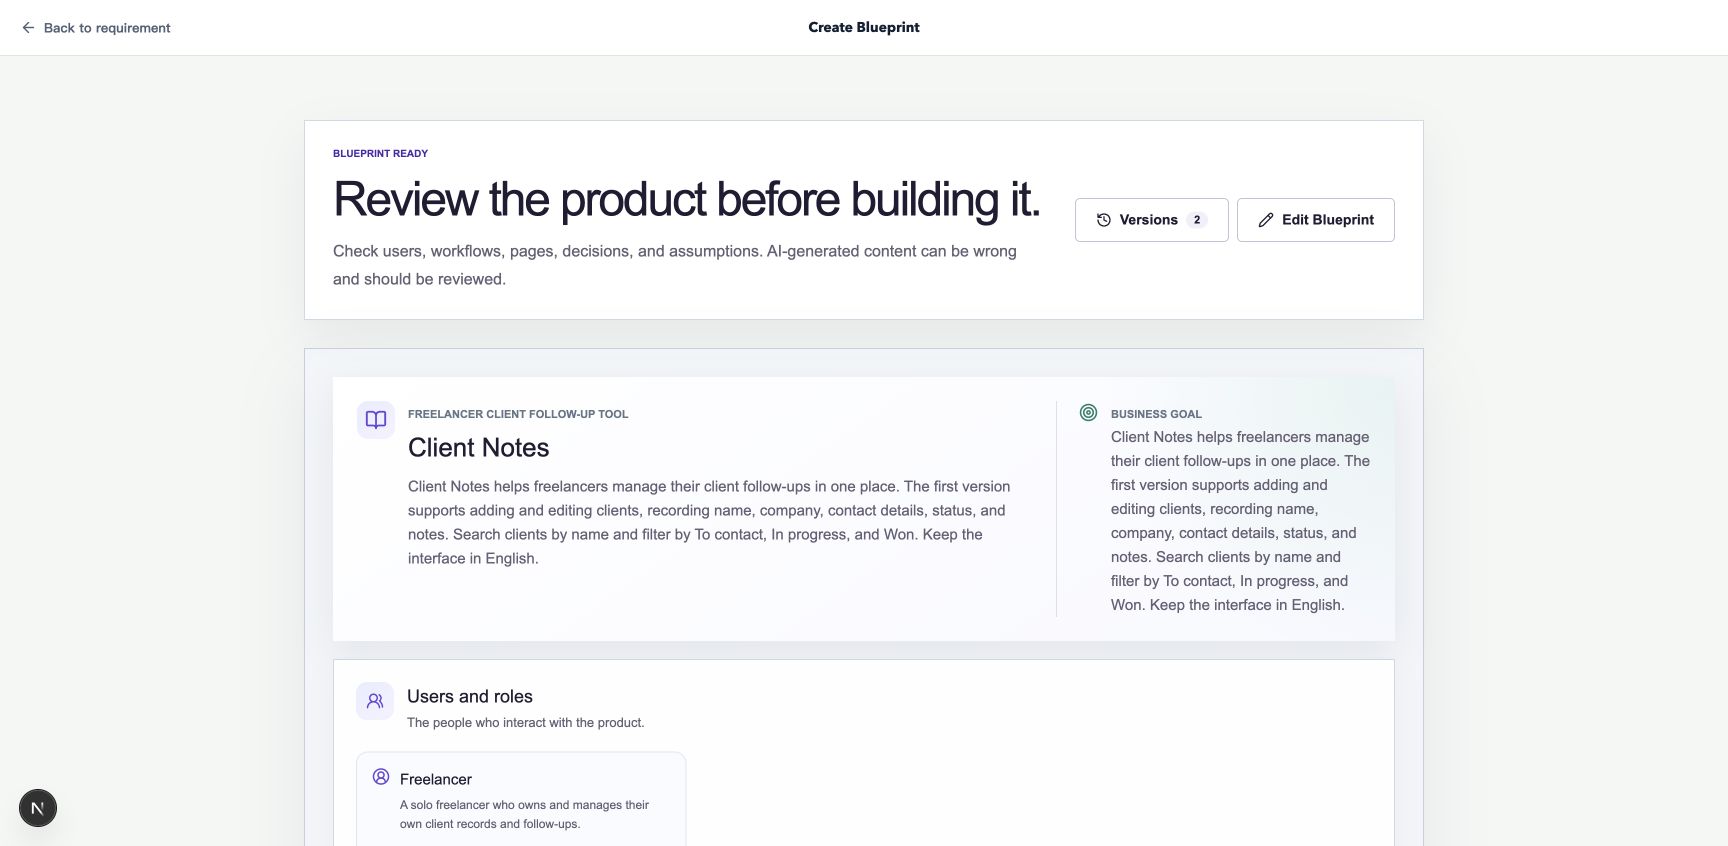
Review the product goal and users before checking the proposed pages and workflows.
If clarification questions appear, answer them based on how you want the app to work. For example, the AI may need to know which statuses a client can have. Review its recommendations and adjust them when your process differs.
You can edit the Blueprint directly or ask AI to propose a change. A useful request might be:
Add an optional next contact date to client information and show it in the client list. Keep the current statuses and search. Do not send automatic reminders.
Review the proposal before confirming it. The goal is to make the core purpose and important decisions clear enough to build. You can refine the product after using the first version.
For a closer look at what to review, see what an app Blueprint should include.
4. Generate the first version
When the Blueprint reflects your idea, select Use this Blueprint in Builder. Sign in and complete email verification if prompted. Continuing into Builder starts the first generation and uses Credits.
Builder shows progress as the app is generated. Pages appear in the workspace, and the conversation explains the work being completed. Once the result is saved and a version number appears, open Preview to try the app.
For Client Notes, the first useful result connects the interface with the underlying records: a form saves a client, the list shows that client, and editing their details changes the saved information.
Your generated layout may differ from the screenshots in this guide. Focus first on whether the main actions and information are present. Visual refinements are easier to choose once you have used the app.
If Builder reports a draft or a task that needs attention, read its explanation and use the available continue or retry action. The first-app walkthrough explains the creation flow and how to inspect the saved result.
5. Try the app as one of its users
Use Preview to complete the task the app was built for. Start with fictional information so you can experiment freely.
For Client Notes, try this short sequence:
- Add a client named Alex Chen with a company name and the status “To contact.”
- Save the client and find them in the list.
- Open the record, change the status to “In progress,” and add a follow-up note.
- Refresh the preview and check that the saved information remains.
- Search for Alex by name, then use the status filter to find the same record.
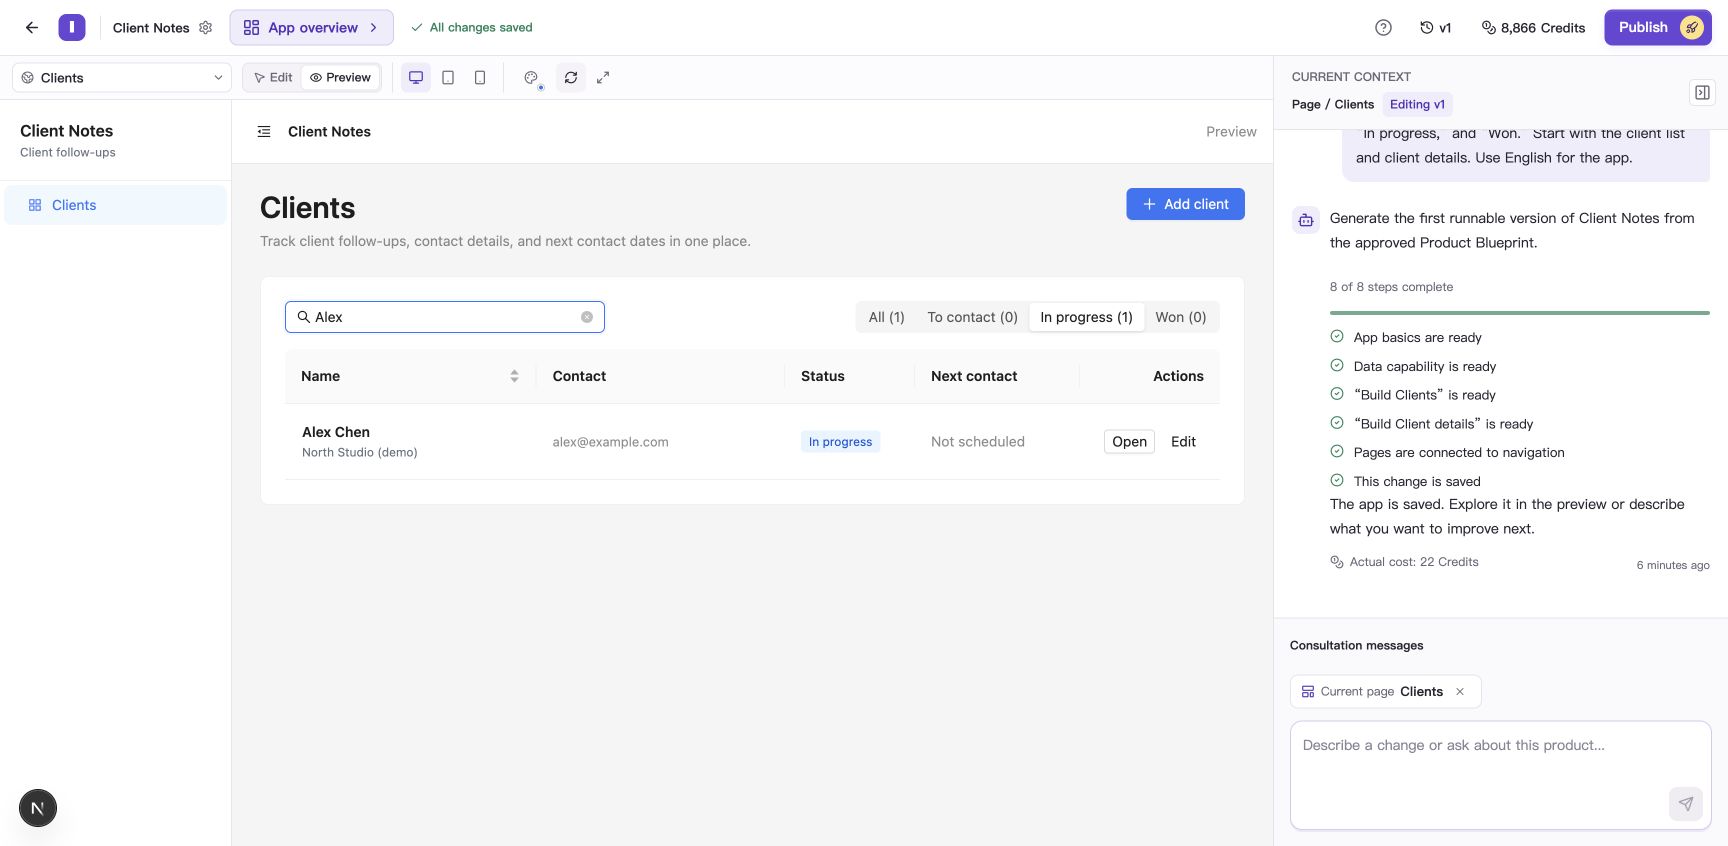
Try a complete task: save a record, update it, and find it again through search and filters.
Also try an action that should be prevented, such as saving a client without a required name. If your app has different user roles, check what each role can see and change. Use the desktop, tablet, and mobile preview sizes to inspect whether the important information and controls remain usable.
These checks give you specific feedback to work with. If something goes wrong, describe the action, the result you saw, and what you expected:
I changed Alex’s status to “In progress” and saved it, but the client list still shows “To contact.” Please make the list show the saved status.
That gives the AI a clear problem to investigate and gives you a clear result to check afterward.
6. Improve the app with focused requests
After trying the first version, you will usually know more about what needs to change. Perhaps a form feels crowded, a label is unclear, or a missing filter makes the daily task slower.
Keep each request centered on a specific outcome. Include where the change belongs and which existing behavior should stay the same.
For example:
The client details view feels crowded. Separate basic information and follow-up information into two sections with more space between them. Keep all existing fields and actions. Apply this to both the detail drawer opened from the client list and the client details page.
For a regular feature change, IdeaMade prepares a change plan. Review the proposed scope, revise it if necessary, and apply it when it matches your request. After the new version is saved, repeat the relevant actions in Preview.
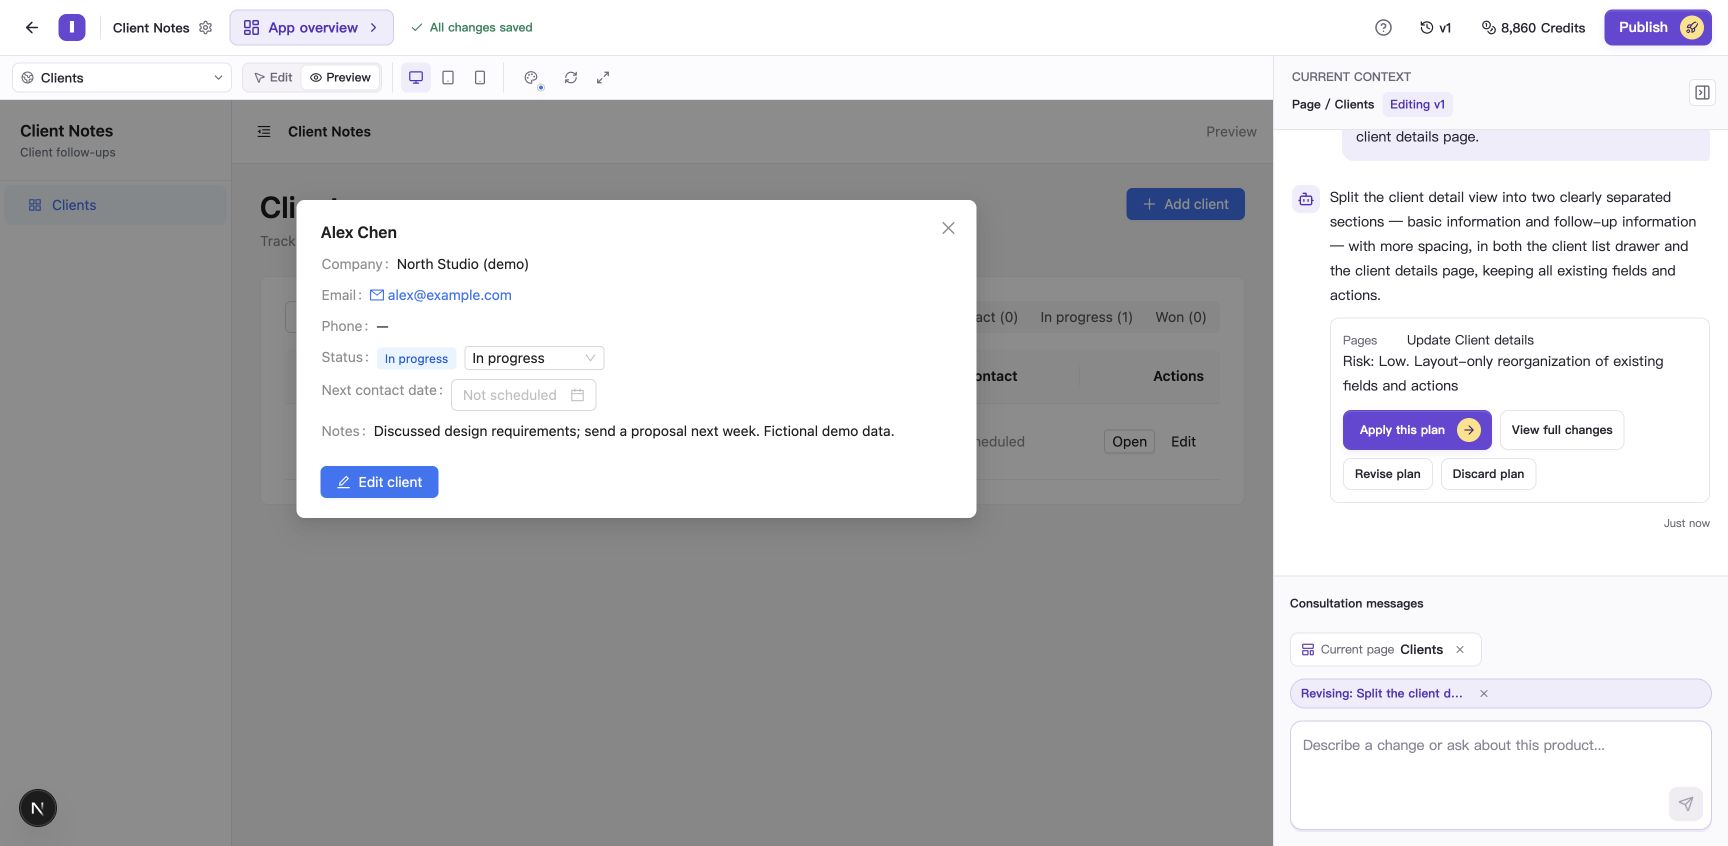
The plan makes the proposed change visible before you apply it.
For a small visual edit, you can select a component in Edit mode and describe what to change. For example, select a button and ask to change its label while keeping its current action. These local component edits can run directly.
The guide to reviewing and applying change plans explains the controls in more detail.
Saved versions also give you a way to revisit earlier work. You can preview an older version and restore it as the current editing version when needed. Restoring a version changes the app’s code and configuration; business records remain in their current state.
7. Publish a version people can use
Once the main workflow meets your expectations, select Publish at the top of Builder. Check the target version, start publication, and wait for the release checks and deployment to finish.
When the version is marked Live, select Open app. Open the resulting address as a user would, sign in if the app requires it, and try the main task again.
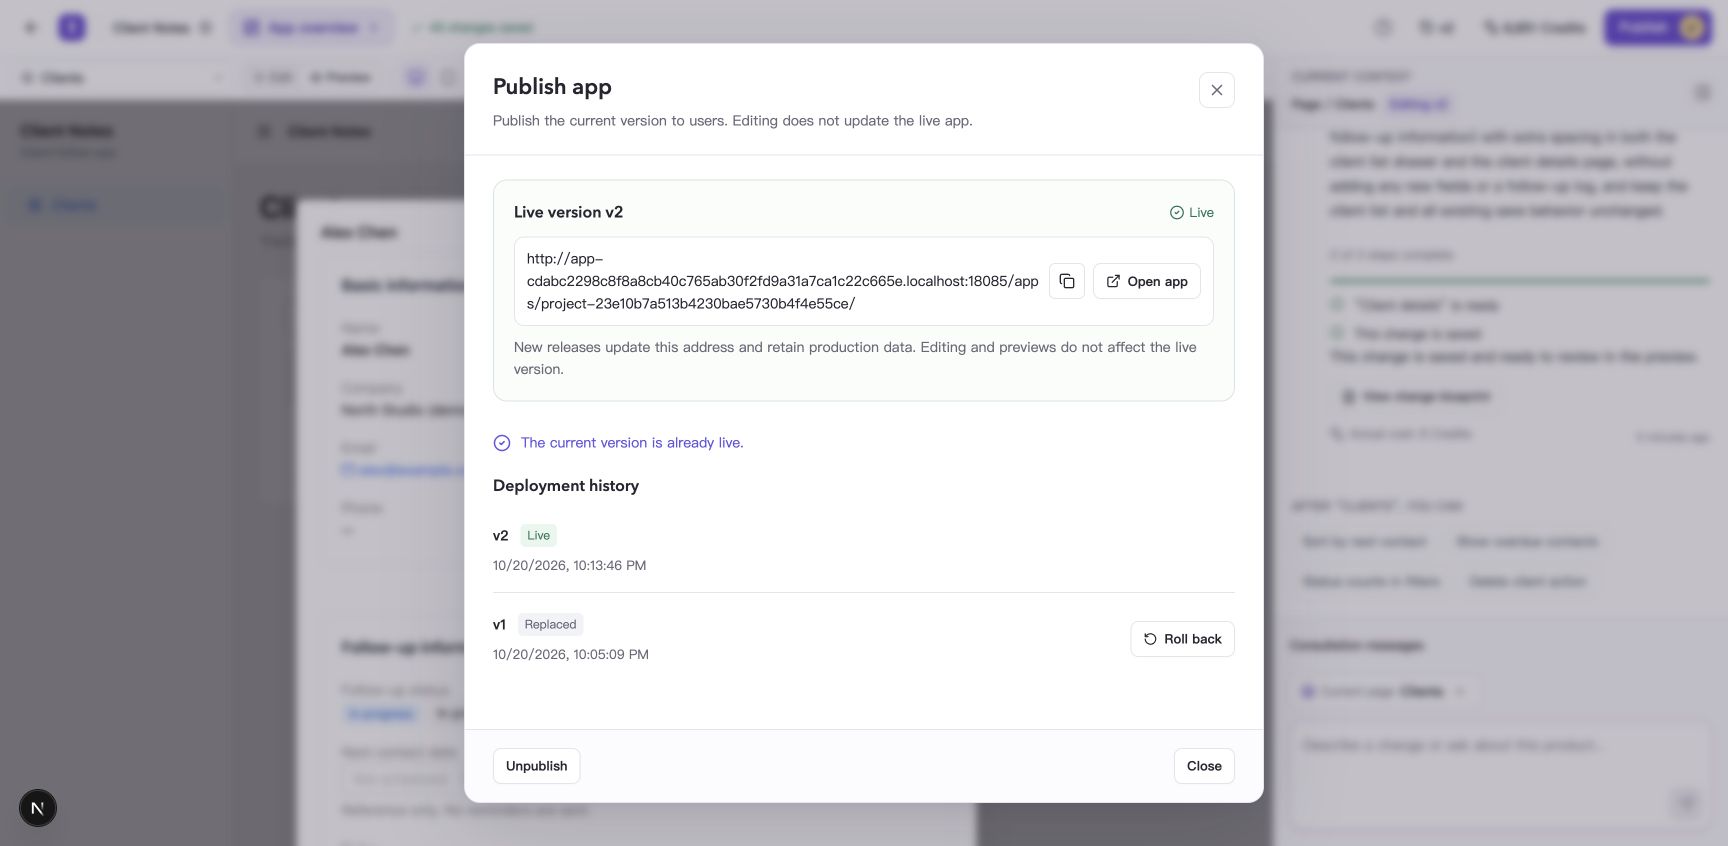
The publishing window shows which version is live and provides the address for opening the app.
Preview and production use separate data. A fictional client you created in Preview will not automatically appear in the published app. Add the records you need in the live app, and configure any required production member roles or external-service credentials.
For this personal client tracker, start by using it for your own work. If you are building a product for other people, invite a few intended users to try a specific task and watch where they hesitate or need help.
Later changes can be tried in Preview before you publish an update. The version and publishing guide covers publishing updates, restoring editing versions, and rolling back a live release.
Use the first version to decide what comes next
A working app gives you better information than an expanding list of possible features.
After a week of using Client Notes, you might discover that follow-up dates matter more than additional client fields. Or you might find that the tool already handles the job well and only needs a clearer layout.
Choose the next change from that experience. Describe the problem, review the proposed change, try the result, and publish when ready. This is also why keeping an AI-generated app maintainable matters: the product’s purpose and important rules need to stay understandable as the app evolves.
To begin, choose one task you know well and explain what a useful first version would let you do. You can create your Blueprint in IdeaMade, review the idea, and take it into Builder when you are ready.
Common questions
Do I need programming knowledge?
You can follow this workflow without writing code. Your main work is describing the purpose, making product decisions, trying the app, and explaining changes. Features that use an external service may also require an account and credentials for that service.
How much does it cost to build an app?
Generating an app, preparing change plans, applying changes, and making repairs use Credits. Usage depends on the app and the work involved. Check your balance and usage in IdeaMade, and review the current plans before starting a larger build.
Can I change the app after publishing?
Yes. Continue working in Builder, try the new version in Preview, and publish an update when ready. Editing the app does not immediately replace the version your users are using.