Create your first app
On this page
Start with an idea, turn it into a Product Blueprint, and let IdeaMade generate your first app. This tutorial uses a client follow-up tool to walk you through creation, preview, and your first checks.
Before you start
Use Builder on a desktop computer. Sign in to IdeaMade and, if you have just registered, follow the instructions to verify your email. Generating and changing an app uses Credits. You can check your balance on the projects page or in Builder.
This walkthrough uses Client Notes and fictional client records. Adapt the name and features to your idea; generated layouts, labels, and questions may differ from the screenshots.
Describe what you want to create
-
On the projects page, select New Project.
-
Describe who the app is for and what people should be able to do. For example:
Create a client follow-up tool for freelancers called “Client Notes.” I want to add and edit clients, recording their name, company, contact details, follow-up status, and notes. The client list should support name search and filtering by “To contact,” “In progress,” and “Won.” Start with the client list and client details. Use English for the app.
-
Select Start and wait for the Product Blueprint.
The Blueprint organizes your idea into goals, roles, pages, data, and workflows. Page sketches help you understand the design. The interactive app comes after the build.
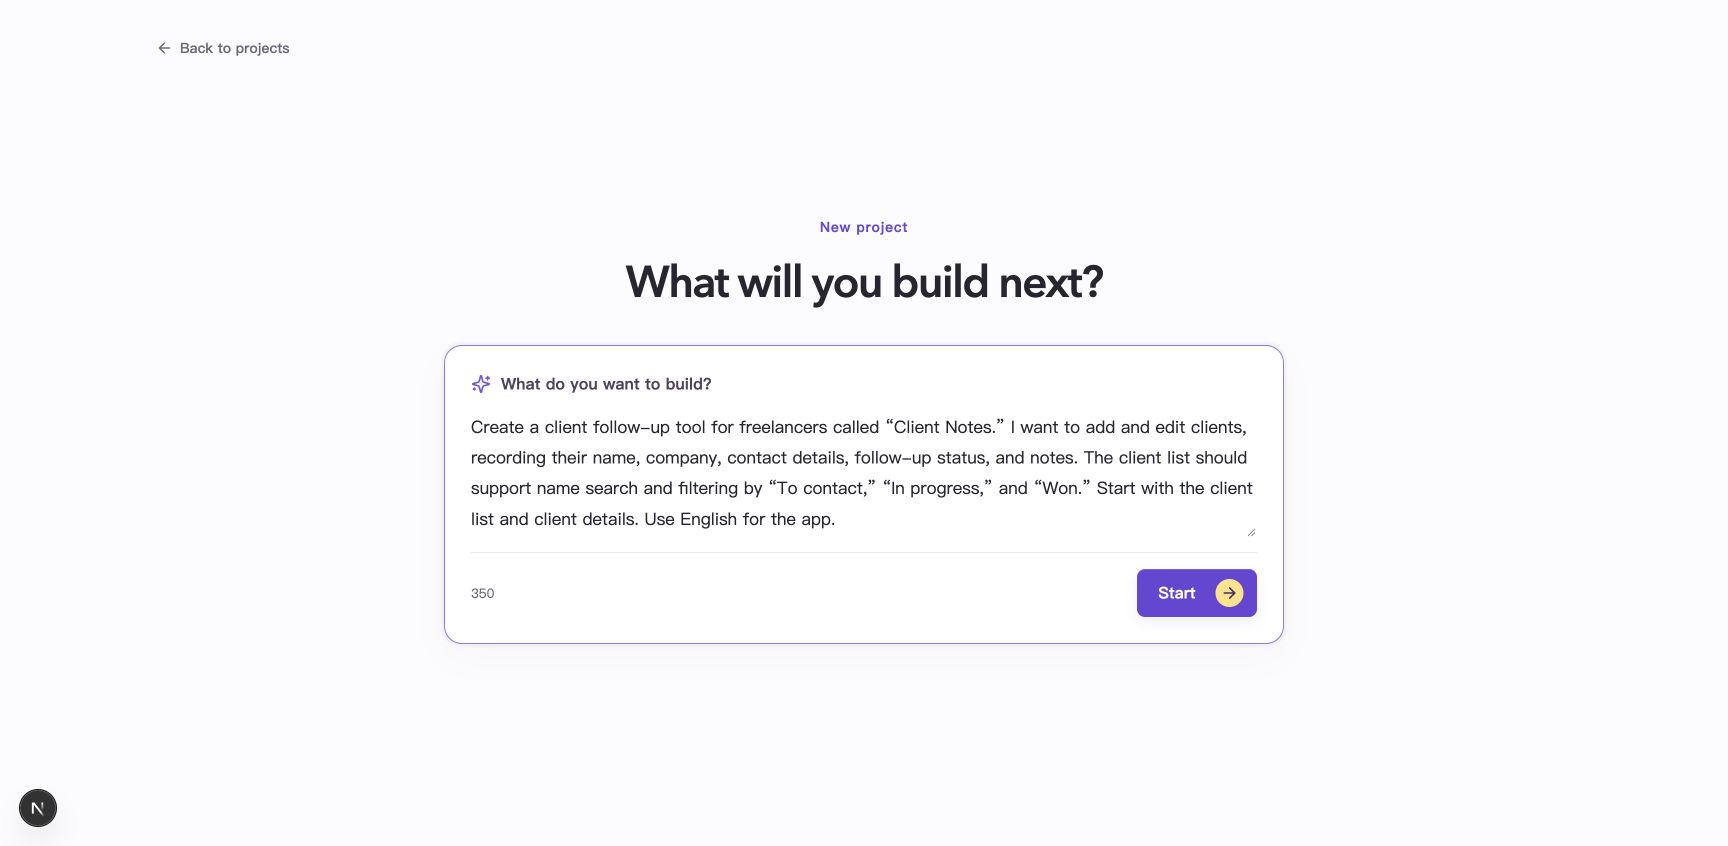
Describe the purpose, users, and main actions, then select Start.
Review and adjust your Product Blueprint
Check that the Blueprint reflects your idea:
- Audience and goal: Who will use the tool, and what problem will it solve?
- Pages and actions: Does it include the client list, client details, and adding and editing clients?
- Data and rules: What information does each client need, and how should follow-up statuses work?
If clarification questions appear, answer them and select Update this Blueprint. Read the recommended choices if you are unsure.
To make changes, select Edit Blueprint or describe an adjustment to the AI. For example:
Add a “Next contact date” to client details and show it in the client list. Leave automatic reminders out for now.
For an AI proposal, select Review proposal, compare the proposed changes, and select Confirm change. Save your changes or cancel editing before continuing to Builder.
You can keep improving the Blueprint. For the first version, make the core purpose clear. You can request further changes after trying the app.
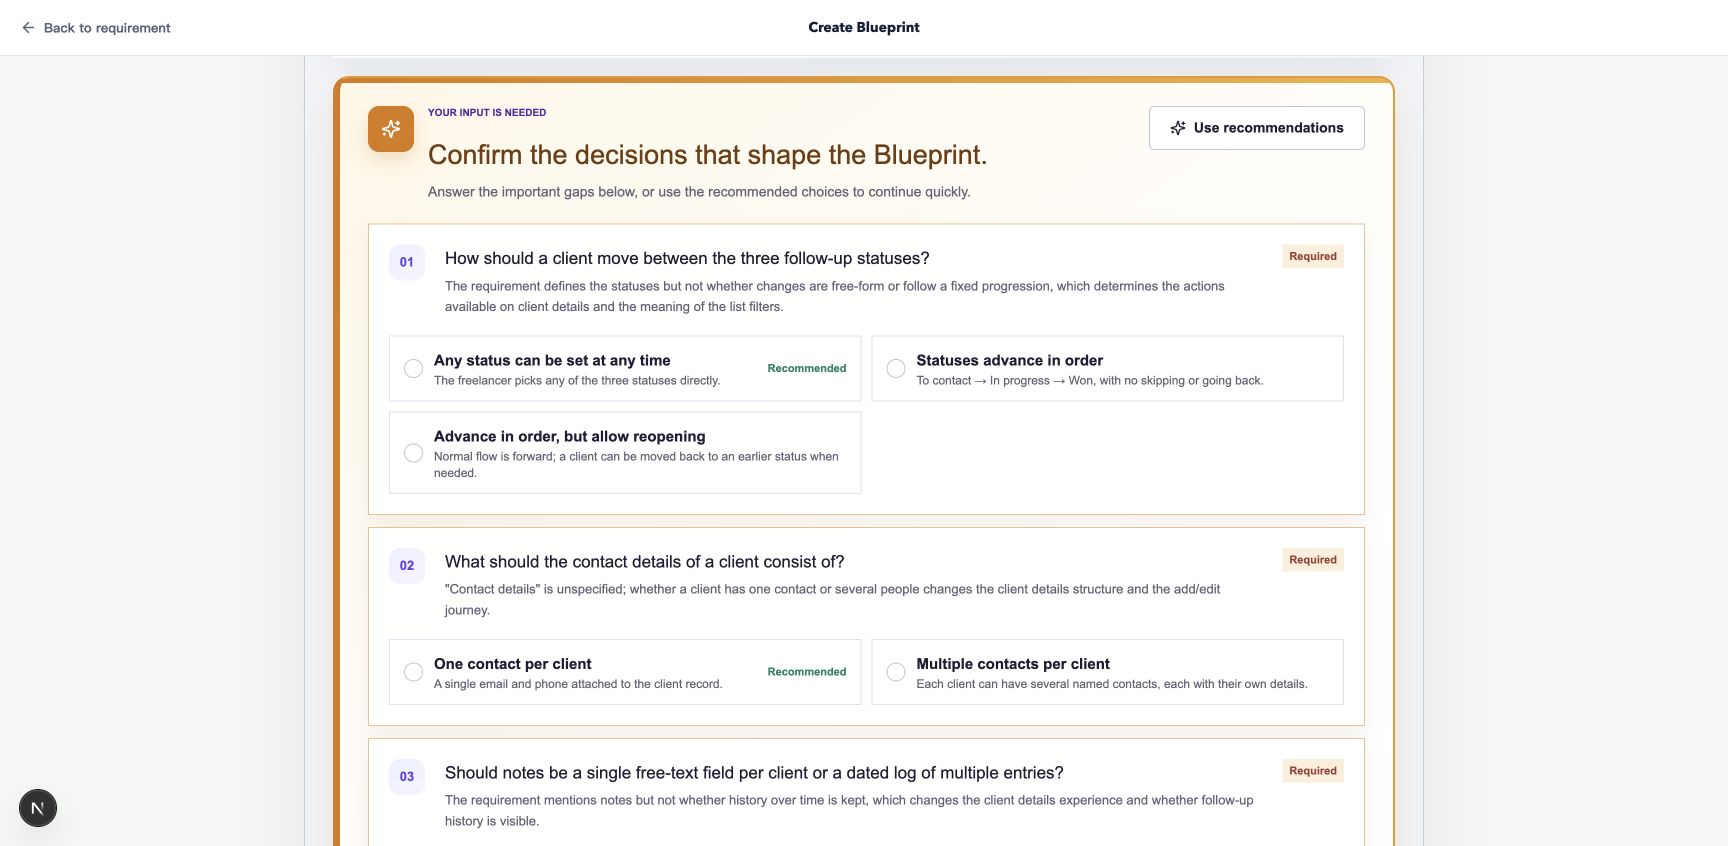
Answer the clarification questions for your app, then update the Blueprint. The questions may vary.
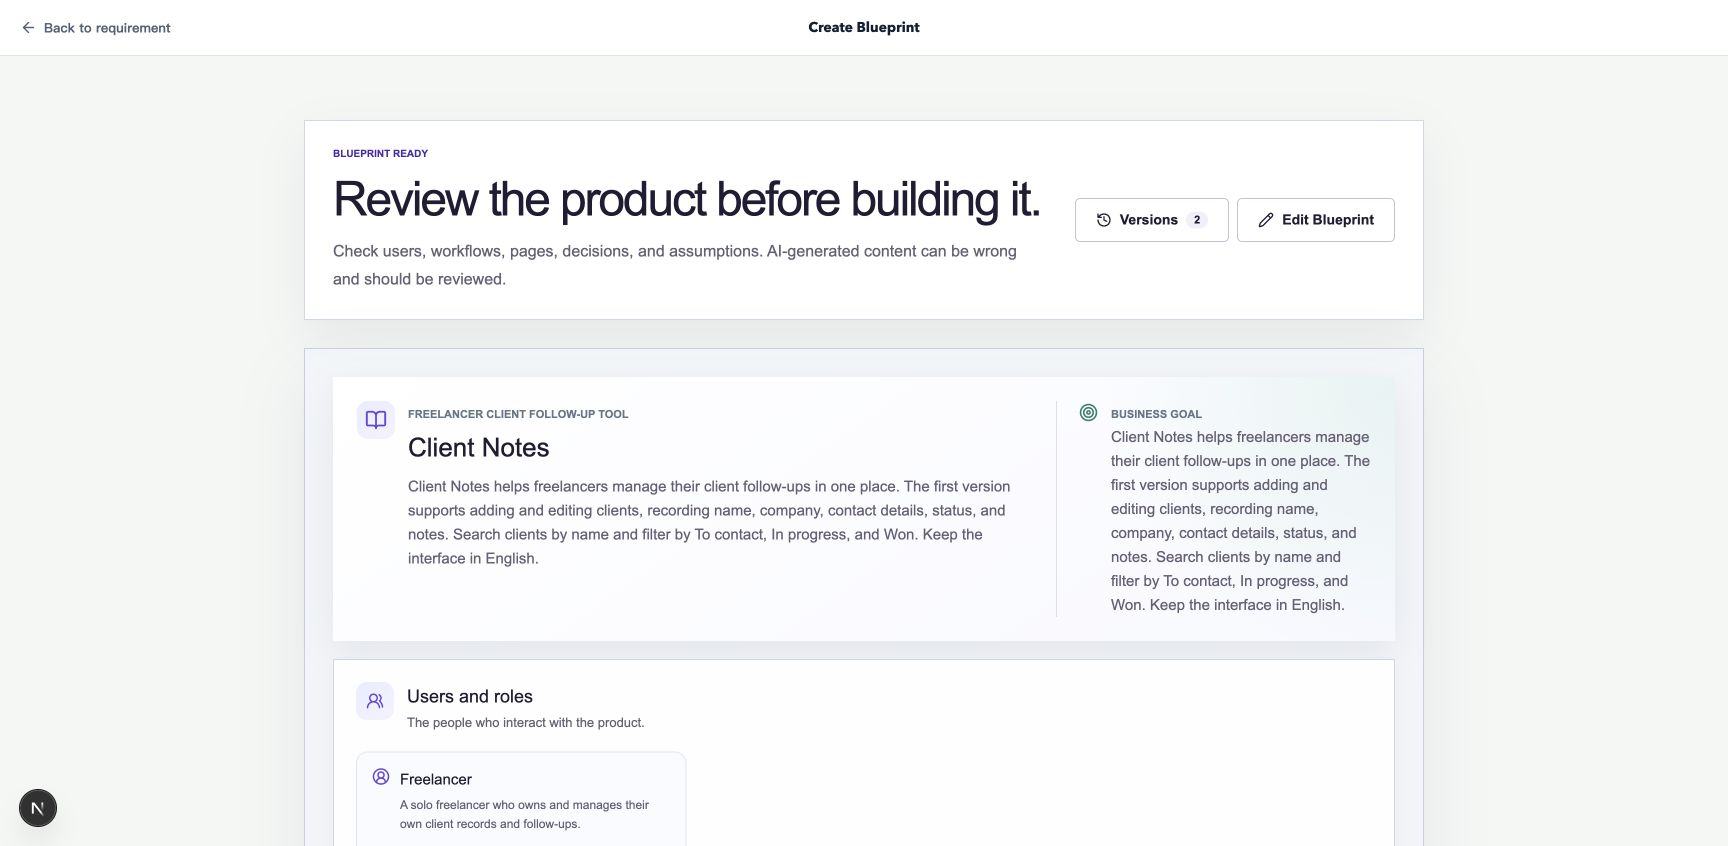
Check that the product purpose, pages, and core workflows match your intent.
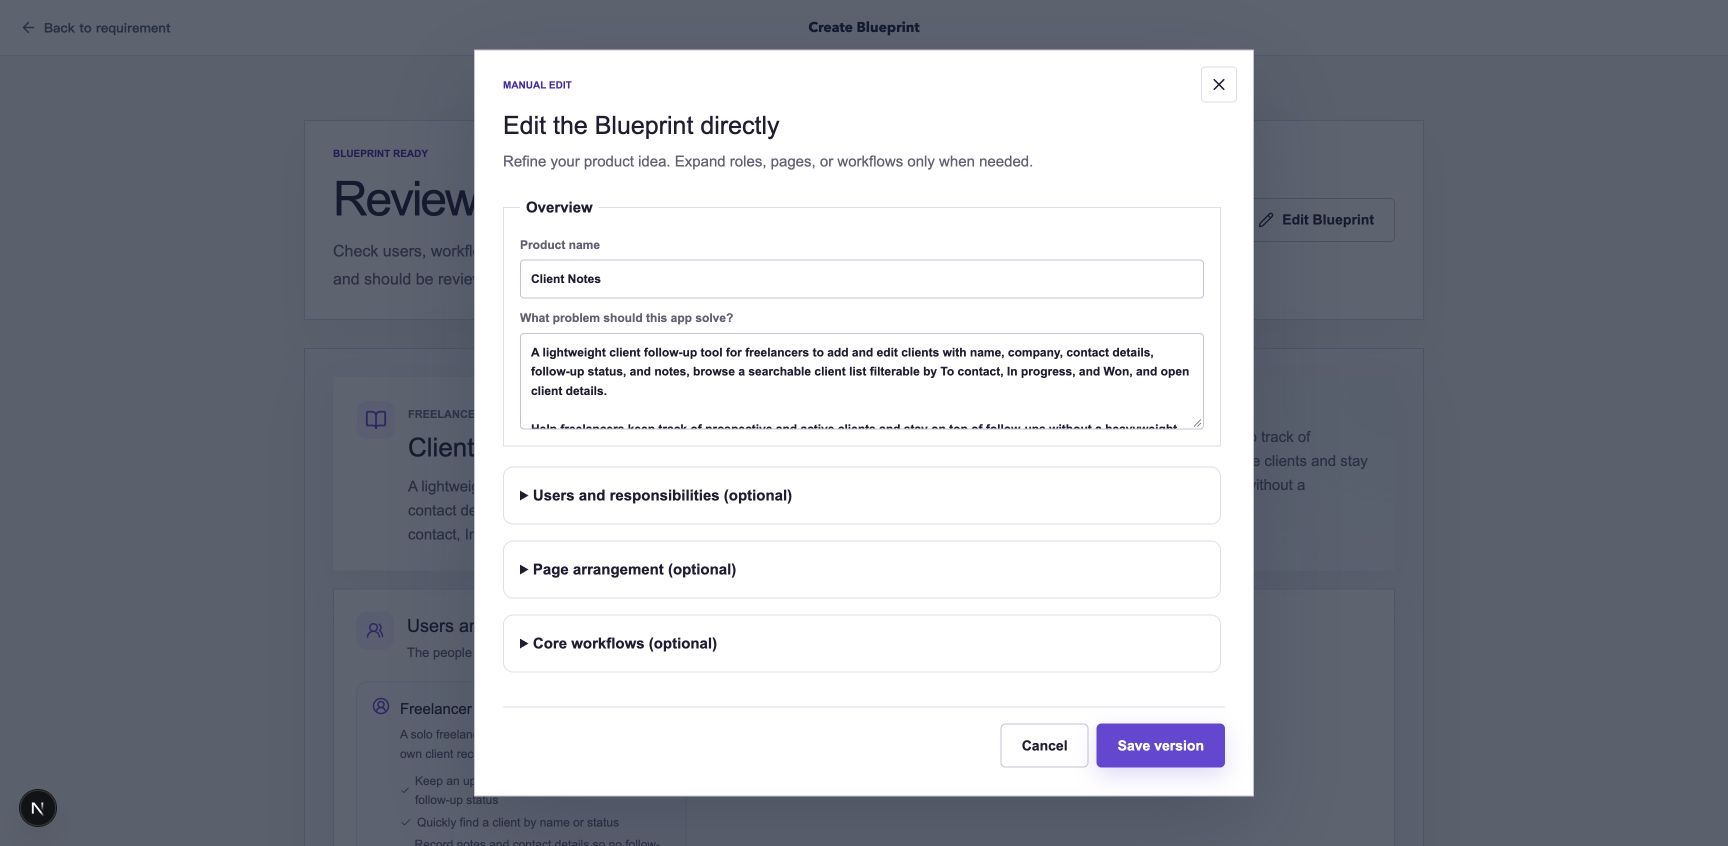
Edit the product description directly, then save a new Blueprint version.
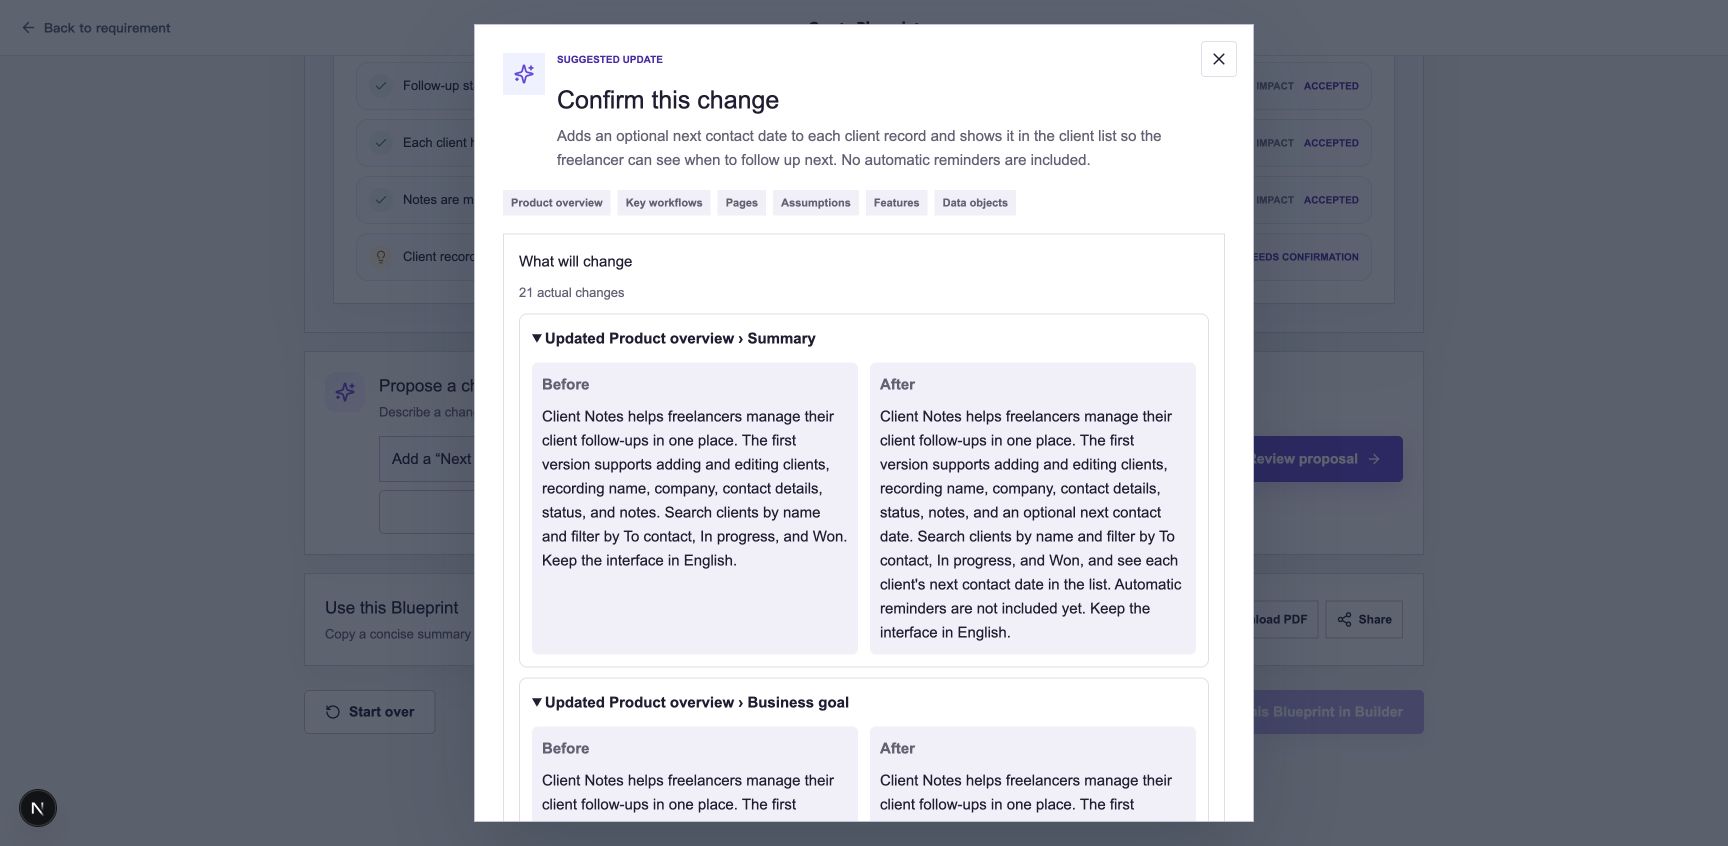
Review the before-and-after changes in the AI proposal. The confirmation button is at the bottom.
Open Builder and generate the app
- When you are ready to build, select Use this Blueprint in Builder.
- If you are asked to sign in or verify your email, complete that step and continue to the project.
- Builder starts preparing and generating the first version. Follow the progress in the conversation and respond to any prompts that need your attention.
Continuing into Builder starts the first build and uses Credits.
During generation, pages appear progressively in the canvas while the conversation shows progress. Once the task result appears and the top bar shows a saved version number, you can check that version in Preview.
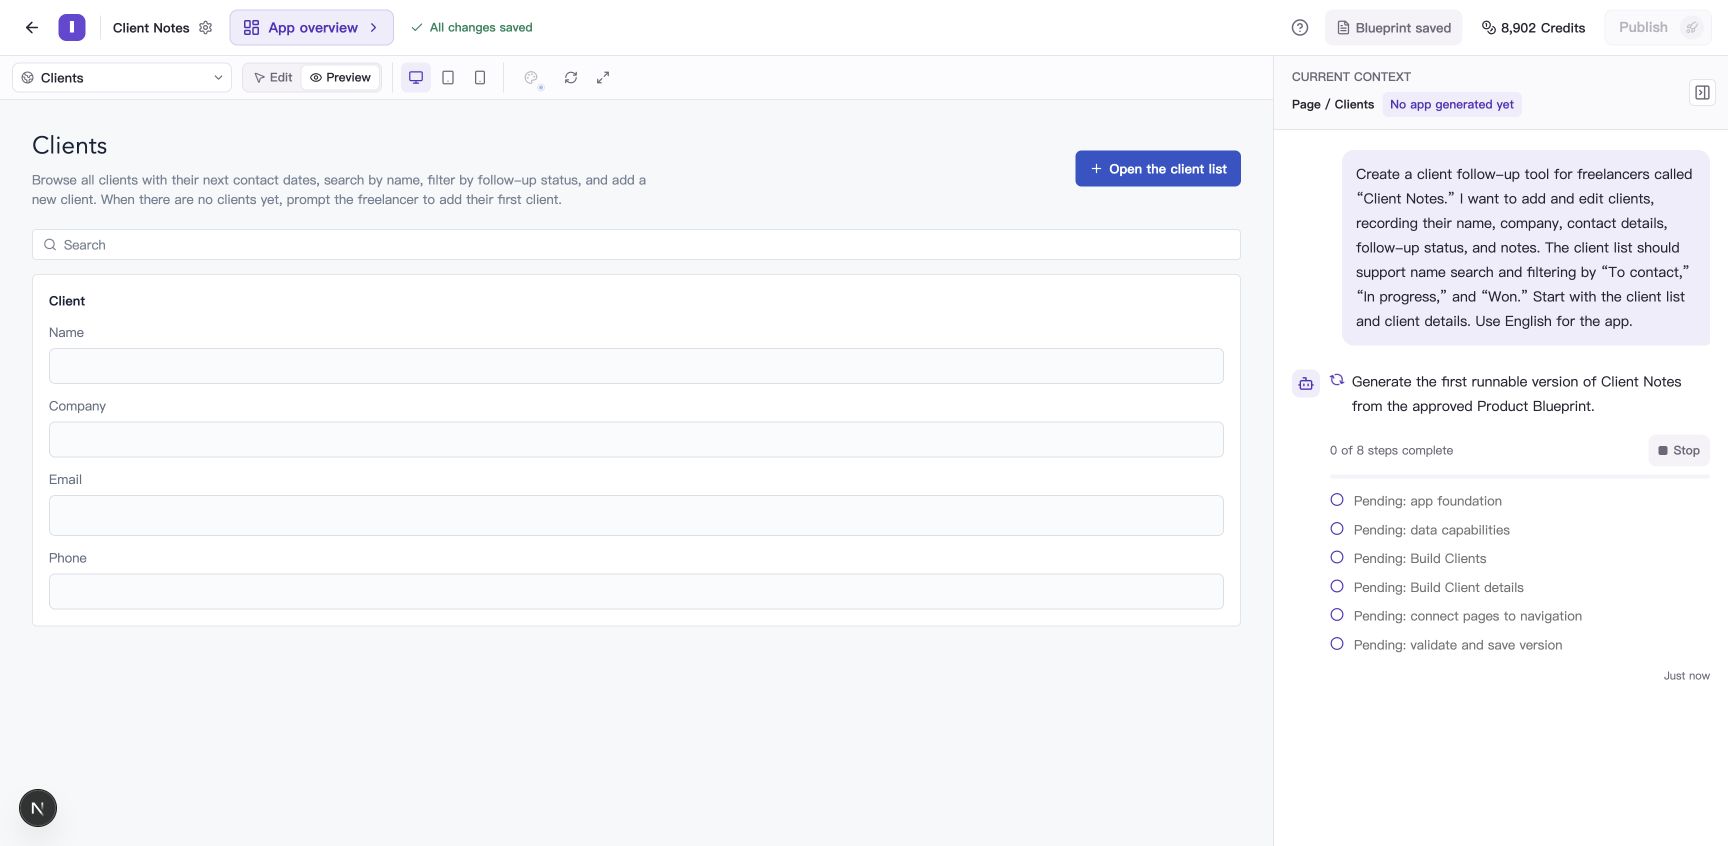
Follow the current generation step. Review the complete app after the result is saved.
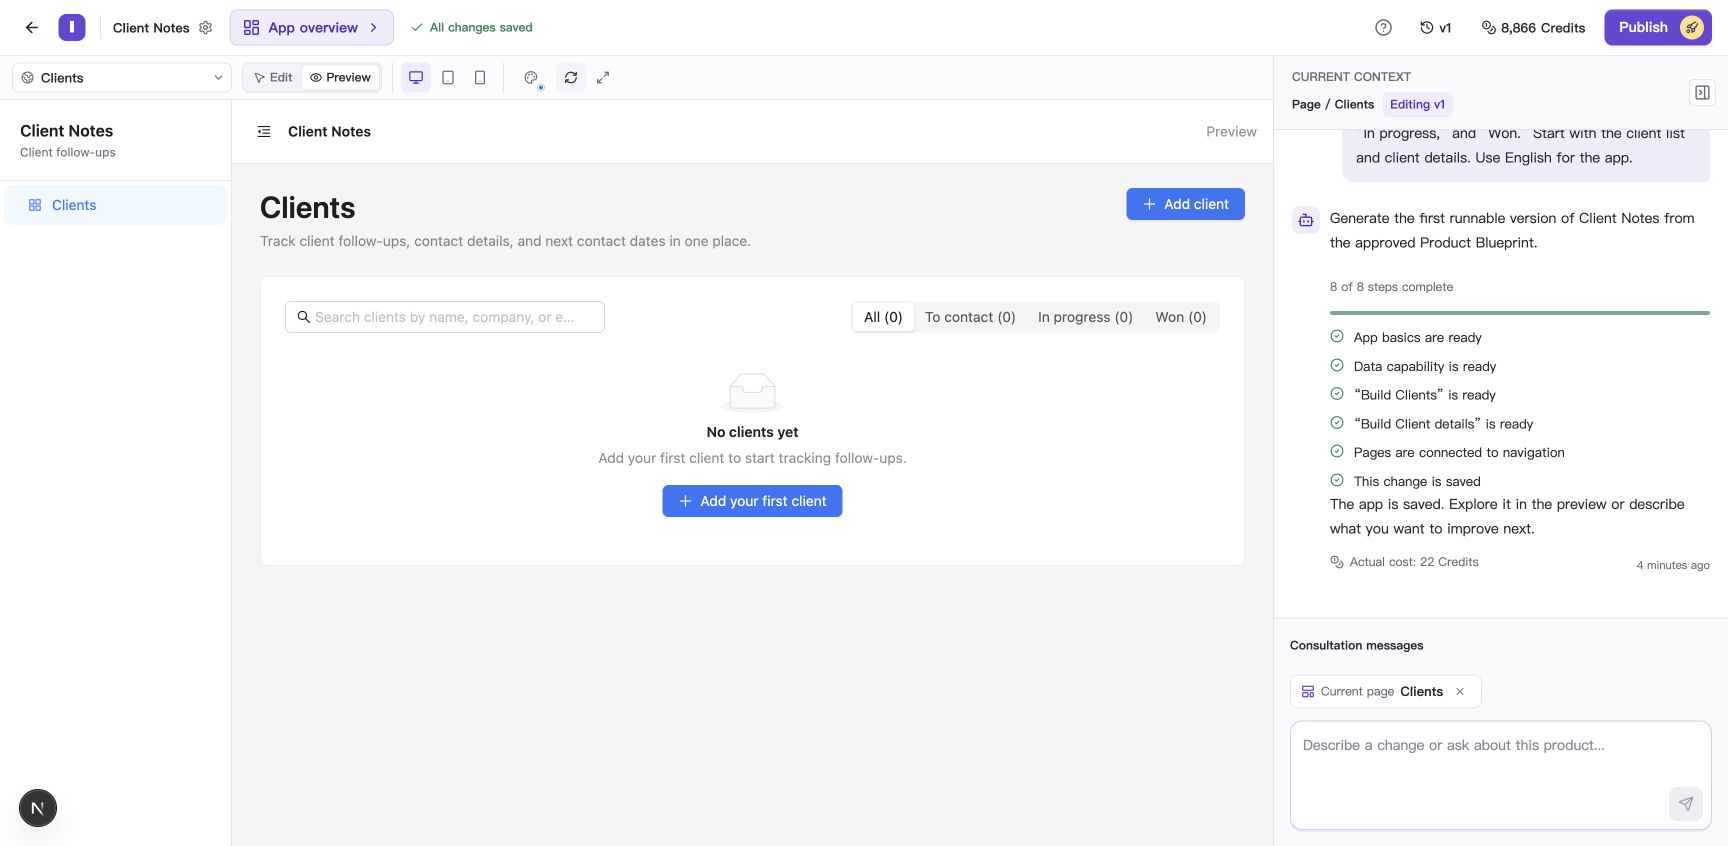
The first version is saved: v1 appears at the top, the result is on the right, and the app preview is on the left.
Try the app in preview
- Switch the canvas to Preview. This lets you use buttons and forms as an app user would. If the saved preview is temporarily blank, select Refresh in the toolbar to reopen it.
- Use Select page or the app’s own navigation to open the client list.
- Add a fictional client, such as “Alex Chen,” with the status “To contact.”
- Open the client from the list, change and save the status and notes, then return to the list to check the result.
- Try searching by name and filtering by status.
- Switch between desktop, tablet, and mobile previews as needed to check readability and usability.
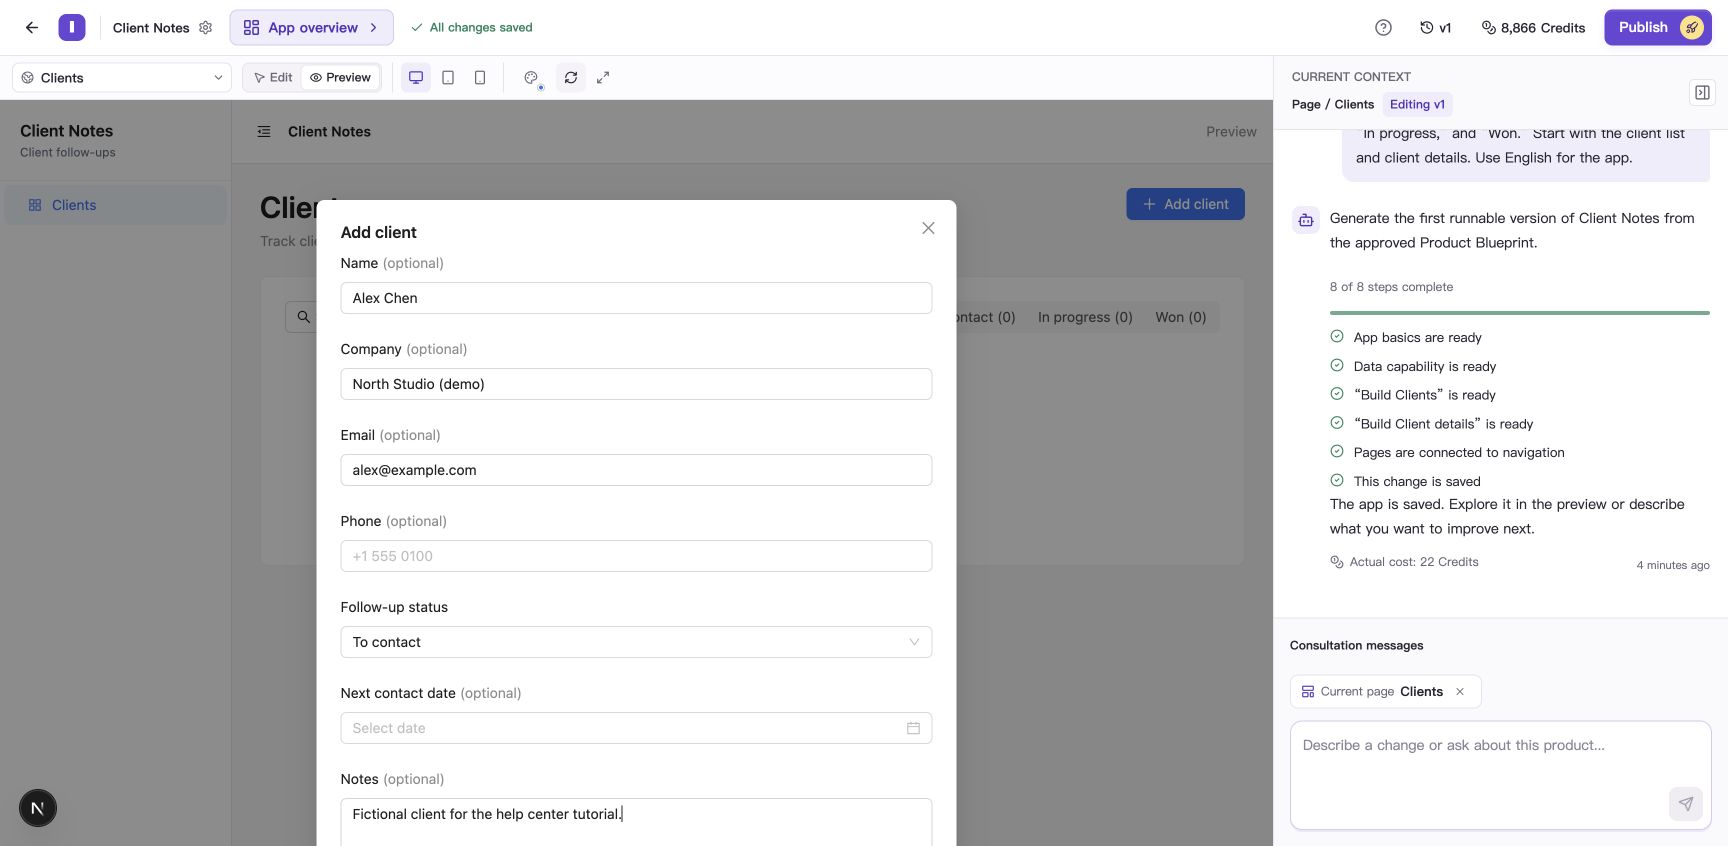
Fill in a fictional client, keep the To contact status, and save.
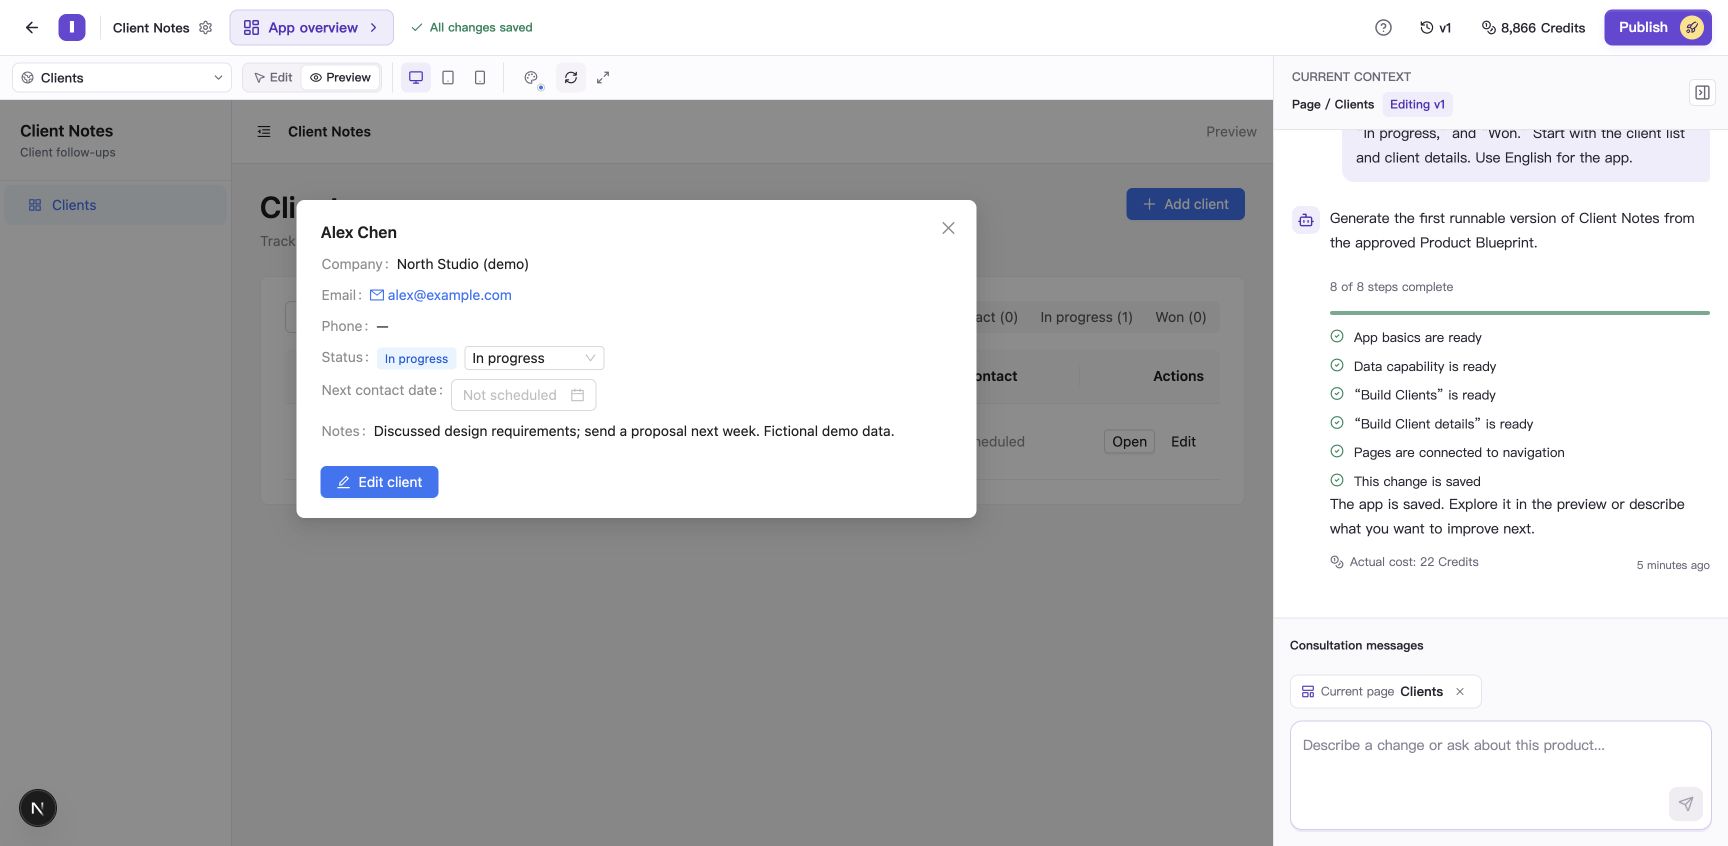
The saved client details show the updated status and notes.
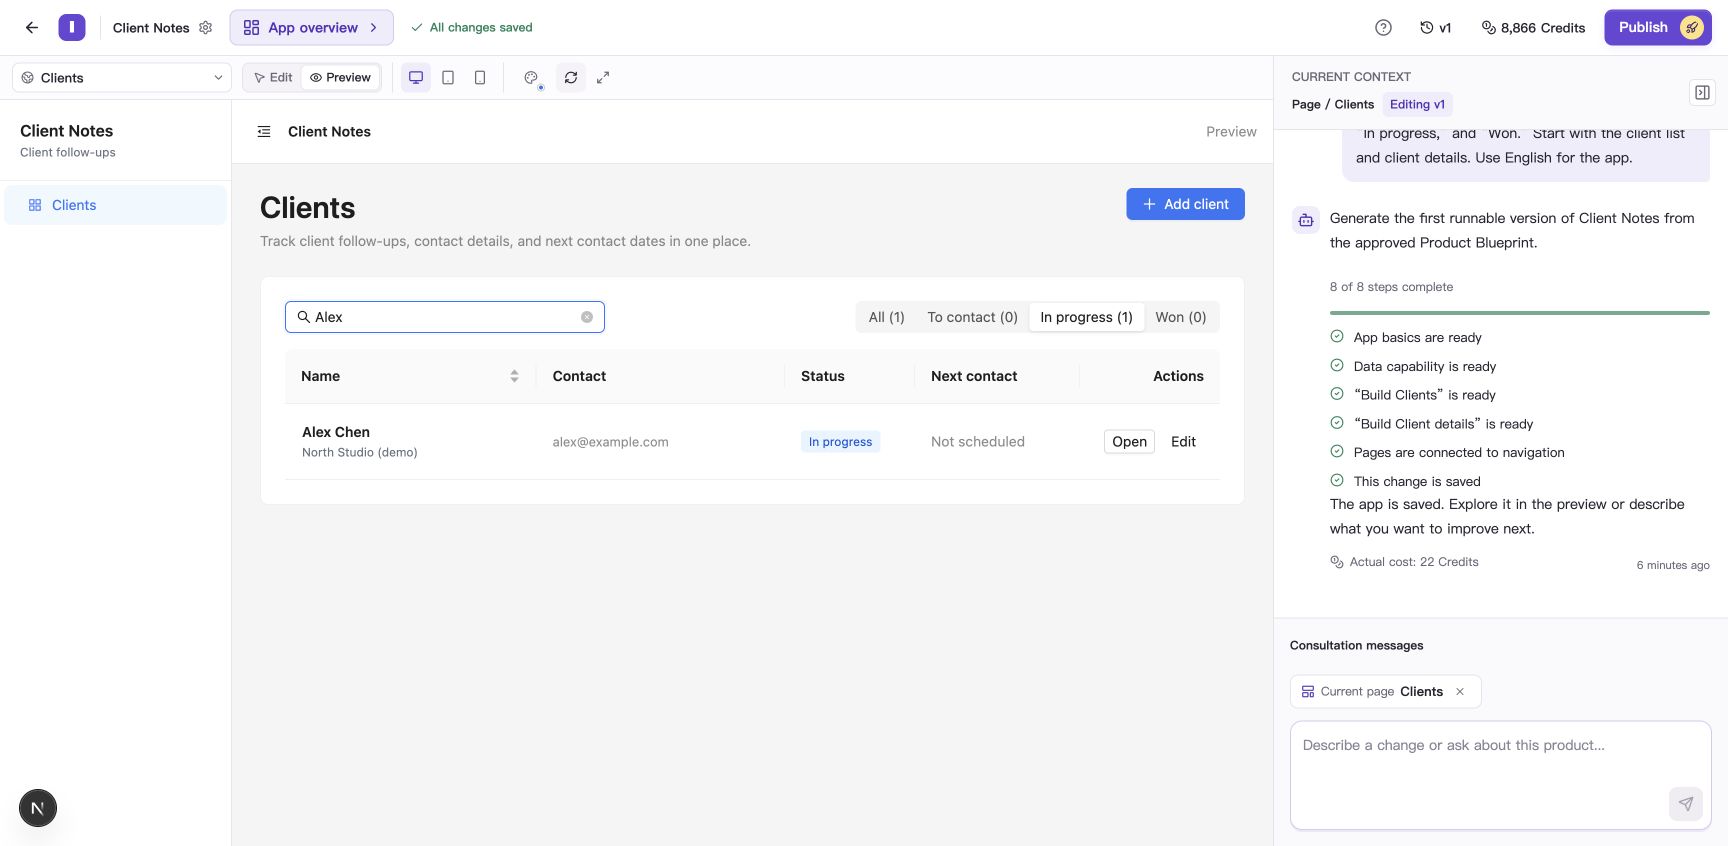
Search by name and select In progress to check the saved client appears.
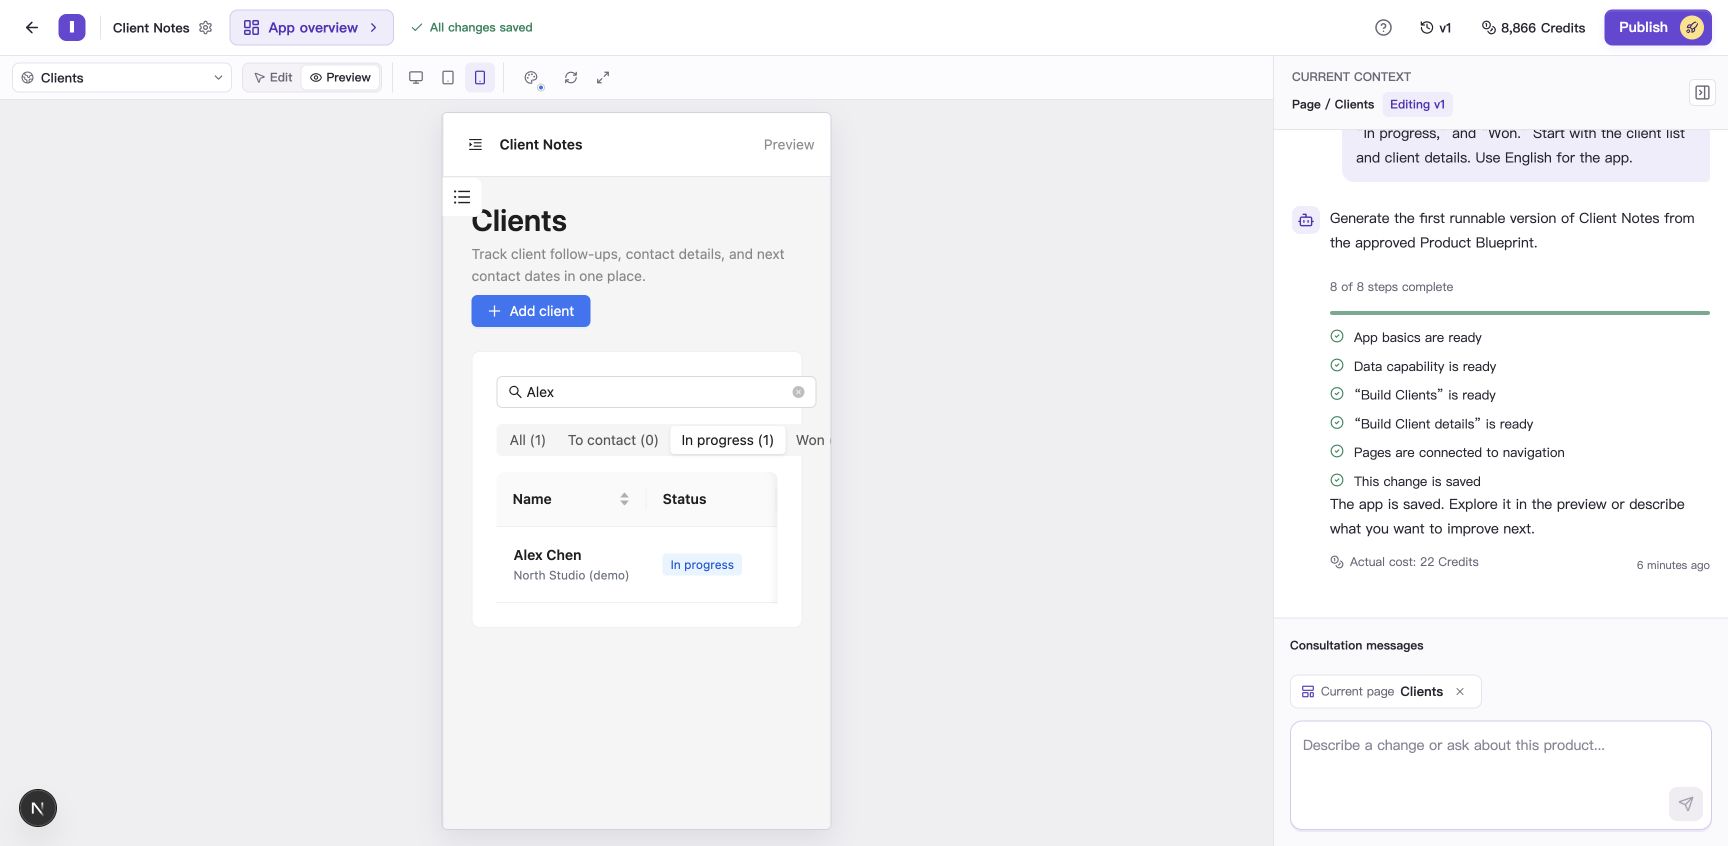
Switch to Mobile to inspect content and actions at a narrow width. Scroll the table horizontally if needed.
If something does not work, describe what you did and what happened:
Searching for “Alex Chen” in the client list does not show the client I just added. I expect the name search to find this record. Please investigate and fix it.
Continue with Request changes to your app.
Continue from the generation result
| What you see | What to do next |
|---|---|
| The app has been generated and saved | Open the preview, check the core actions, then request the next improvement. |
| A draft is saved with work still to finish or repair | Review the saved result and issue details before deciding how to continue. |
| A task stopped or failed and offers a continue action | Read the current task’s explanation and available actions. Contact support if you cannot continue. |
| The original task cannot be recovered, or the Blueprint has changed | Follow the prompt to start a new task from the current Blueprint or app. |
Continuing generation or repair uses Credits. Select the version number at the top of Builder to see saved work in Version history.
Publish when you are ready
Once the first version is saved, continue trying and editing it in Builder. When its main actions meet your expectations, follow Restore versions and publish your app to make it available to others.
The first publication uses separate production storage. Test clients stay in preview; enter production clients through the published app.
Common questions
How do I use a Blueprint I already created on the website?
Select Use this Blueprint in Builder from the existing Blueprint, then sign in to continue.
Does changing IdeaMade’s interface language change my app’s language?
IdeaMade’s interface language controls the platform’s menus and messages. The Blueprint sets the app’s language. To change the app language or add multilingual support, describe the languages and how people will use them in your request.