
Review, revise, and discard change plans
On this page
A normal change request usually produces a plan first. Read the full changes, revise the request, and select “Apply this plan” when ready to start execution. You can also discard a plan you decide to abandon while retaining the conversation record.
Before you start
Open an app with a generated version, return to its current editing version, and clear any unrelated component selection. This article uses a spacing change in Client Notes Studio as an example.
This guide covers plans for normal requests. Selected-component edits, app naming, and theme settings have their own controls. See Choose a page or component to change and Change your app name and theme color.
Understand the plan card
After sending a normal request, wait for the plan and read its goal, change summary, and risk explanation.
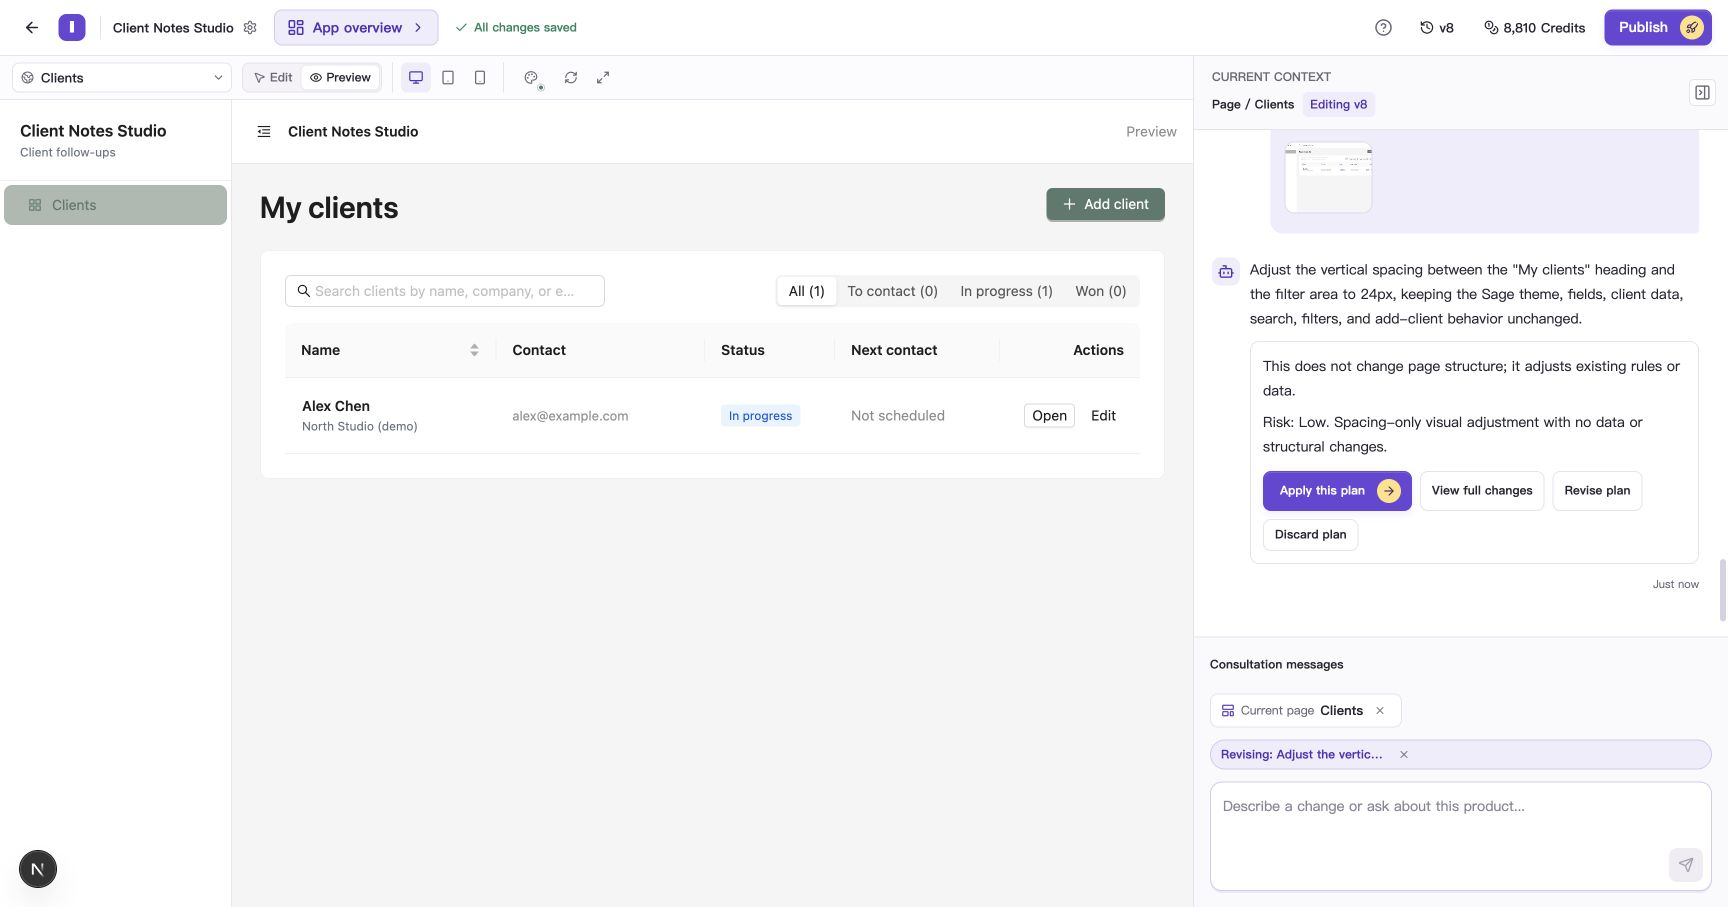
The plan is ready for review, with v8 still the current editing version.
| Action | What it does |
|---|---|
| View full changes | Opens details for you to read and compare |
| Revise plan | Adds the plan to the conversation context so you can request adjustments |
| Apply this plan | Confirms and immediately starts executing this plan |
| Discard plan | Invalidates this unexecuted plan while retaining the conversation record |
View the full changes
- Select View full changes on the card.
- Read the changes, affected scope, risk, and How completion will be checked.
- Compare them with your request. Check the target pages and the data and behaviors you want to retain.
- Choose Close to return to the conversation and decide whether to revise or apply.
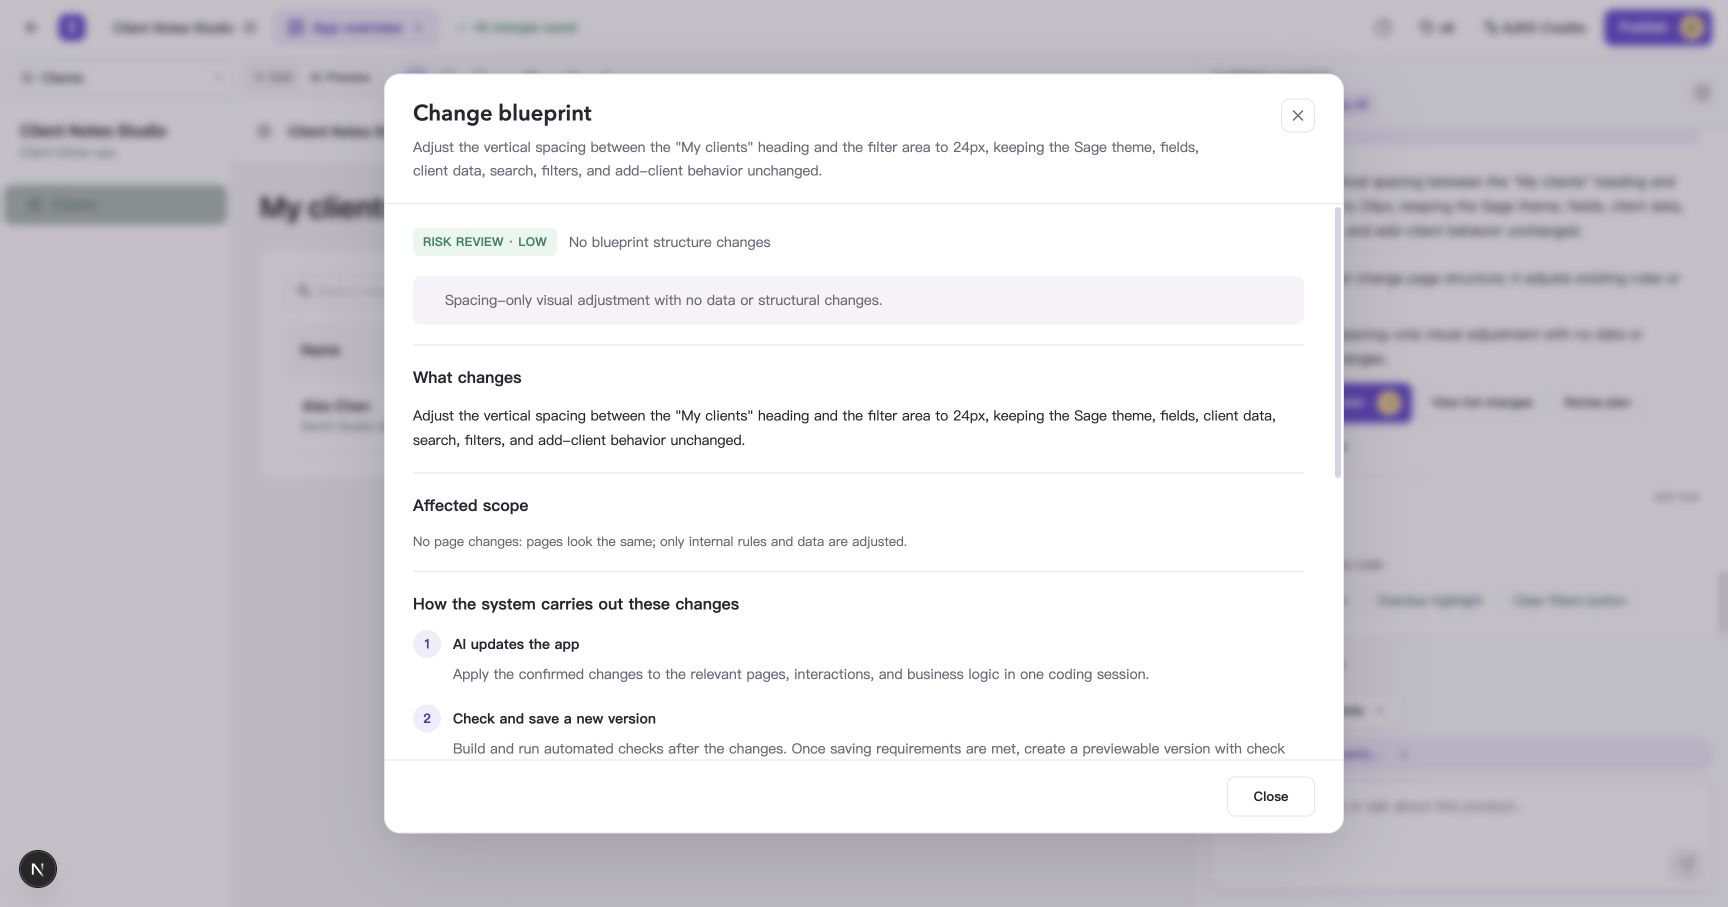
How completion will be checked lists suggested actions to try after applying the change.
Revise the plan and review it again
- Select Revise plan on the card you want to adjust.
- Check for Revising above the composer.
- Describe the difference and what should remain, then select Send request.
For example, replace the original 24px gap with:
Change the gap to 32px. Make the scope explicit: styling on the Clients page only, changing the vertical gap between the heading and filters. Do not add introductory text, fields, or features. Keep the current theme, client data, and existing actions.
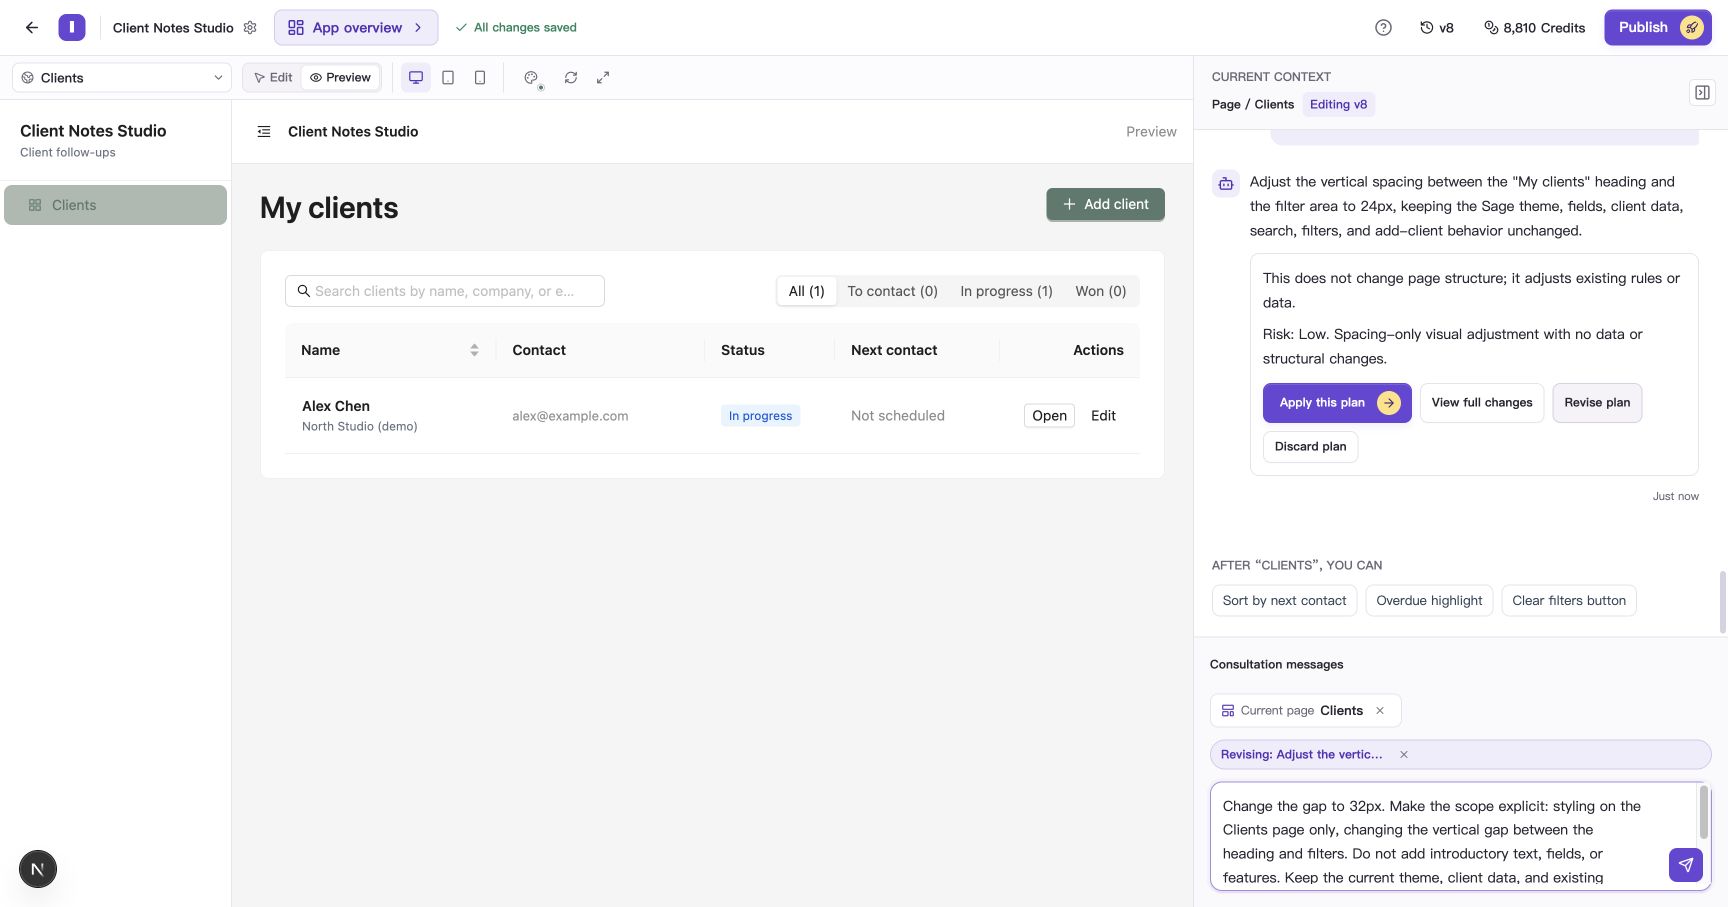
In the revision context, describe the adjustments and what should be preserved.
- Wait for the new plan and check that it includes the revised requirements. The earlier plan is marked discarded; use the new plan to continue.
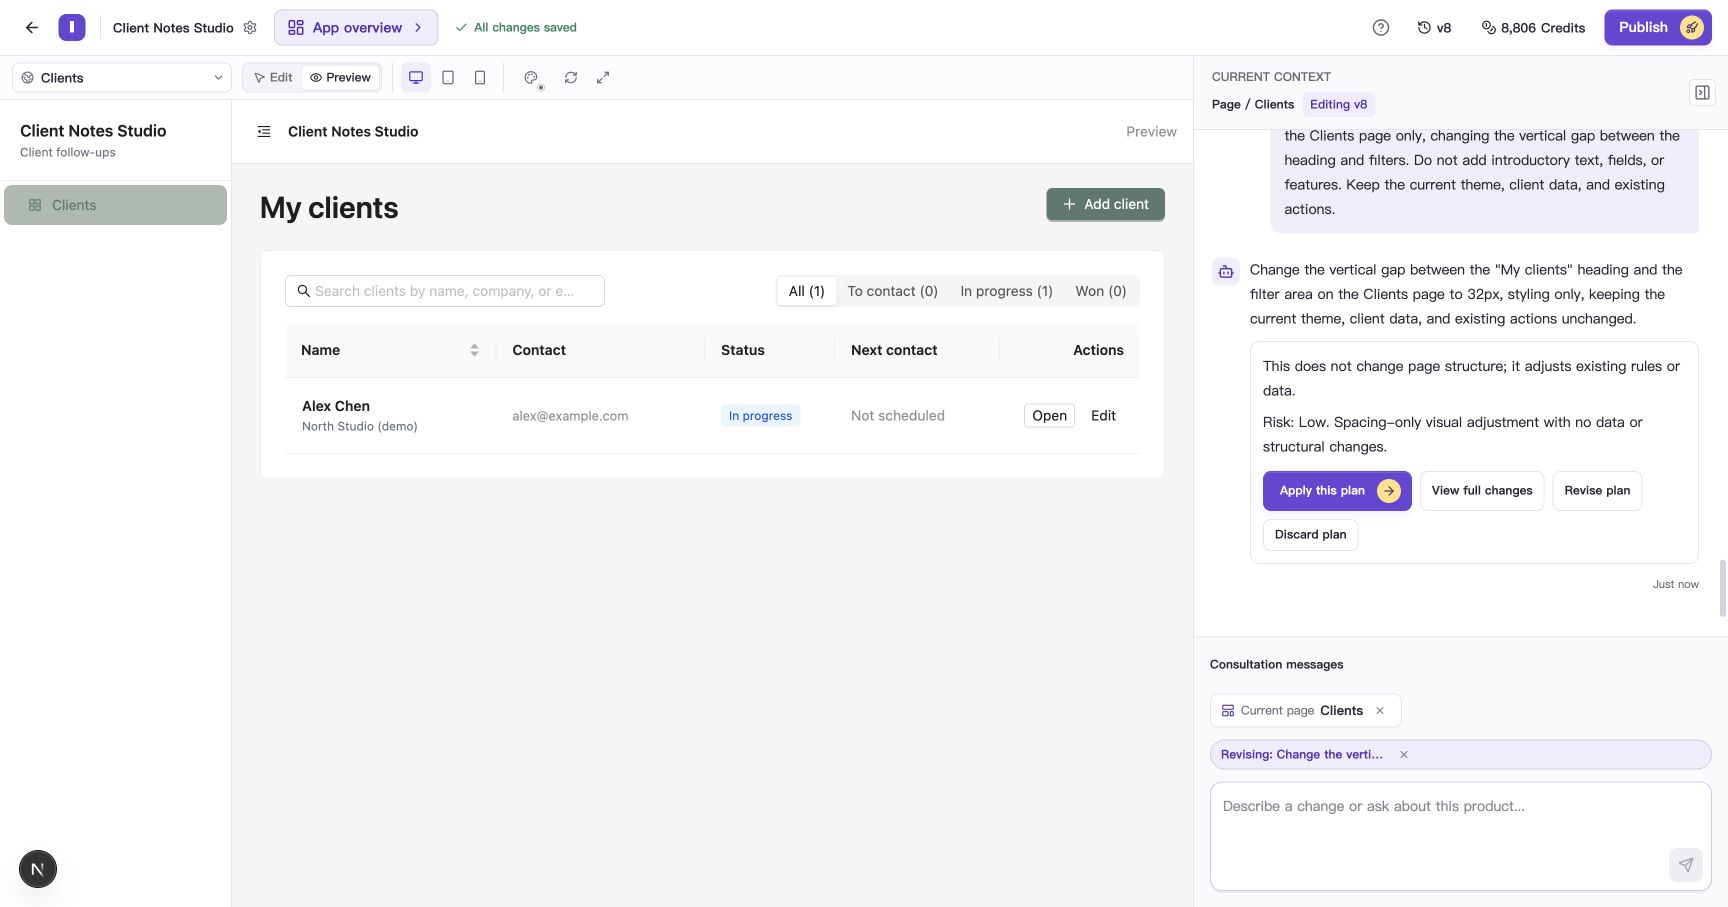
The new plan sets the requested gap to 32px, ready to apply after review.
To discuss an independent request, choose Start a new request beside the revision context. The original plan remains in the conversation. If you decide to abandon it, use Discard plan on its card.
Apply the plan and check the result
- Confirm that the plan matches your goal.
- Select Apply this plan on the correct card to start execution immediately.
- Wait for the task to finish and save a new version.
- Switch to Preview and check both the change and the behavior you asked to keep. Use the canvas toolbar’s Refresh if needed.
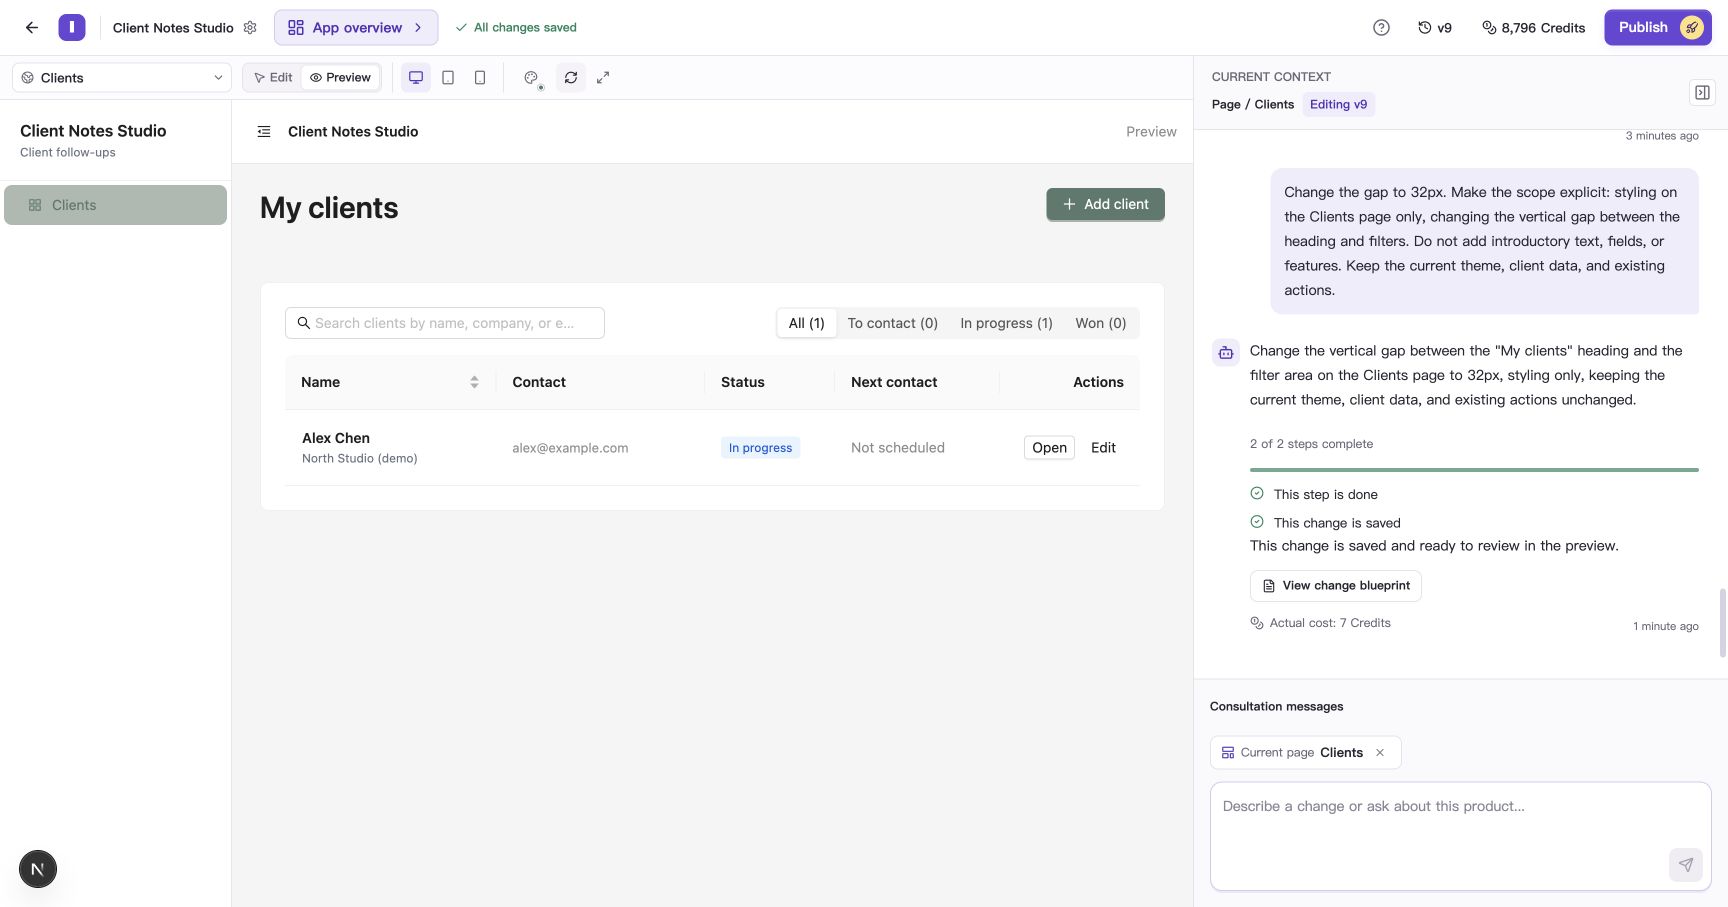
The plan has been applied, and the new version appears in Preview.
In this example, search for an existing client, switch follow-up filters, and open the new-client form to check the usual actions after the spacing change.
The first saved result still had too much spacing, so the follow-up specified the measurement points: “Make the final visible gap from the bottom of the heading row to the top of the filter card 32px.” Review and apply that correction, then check the new version.
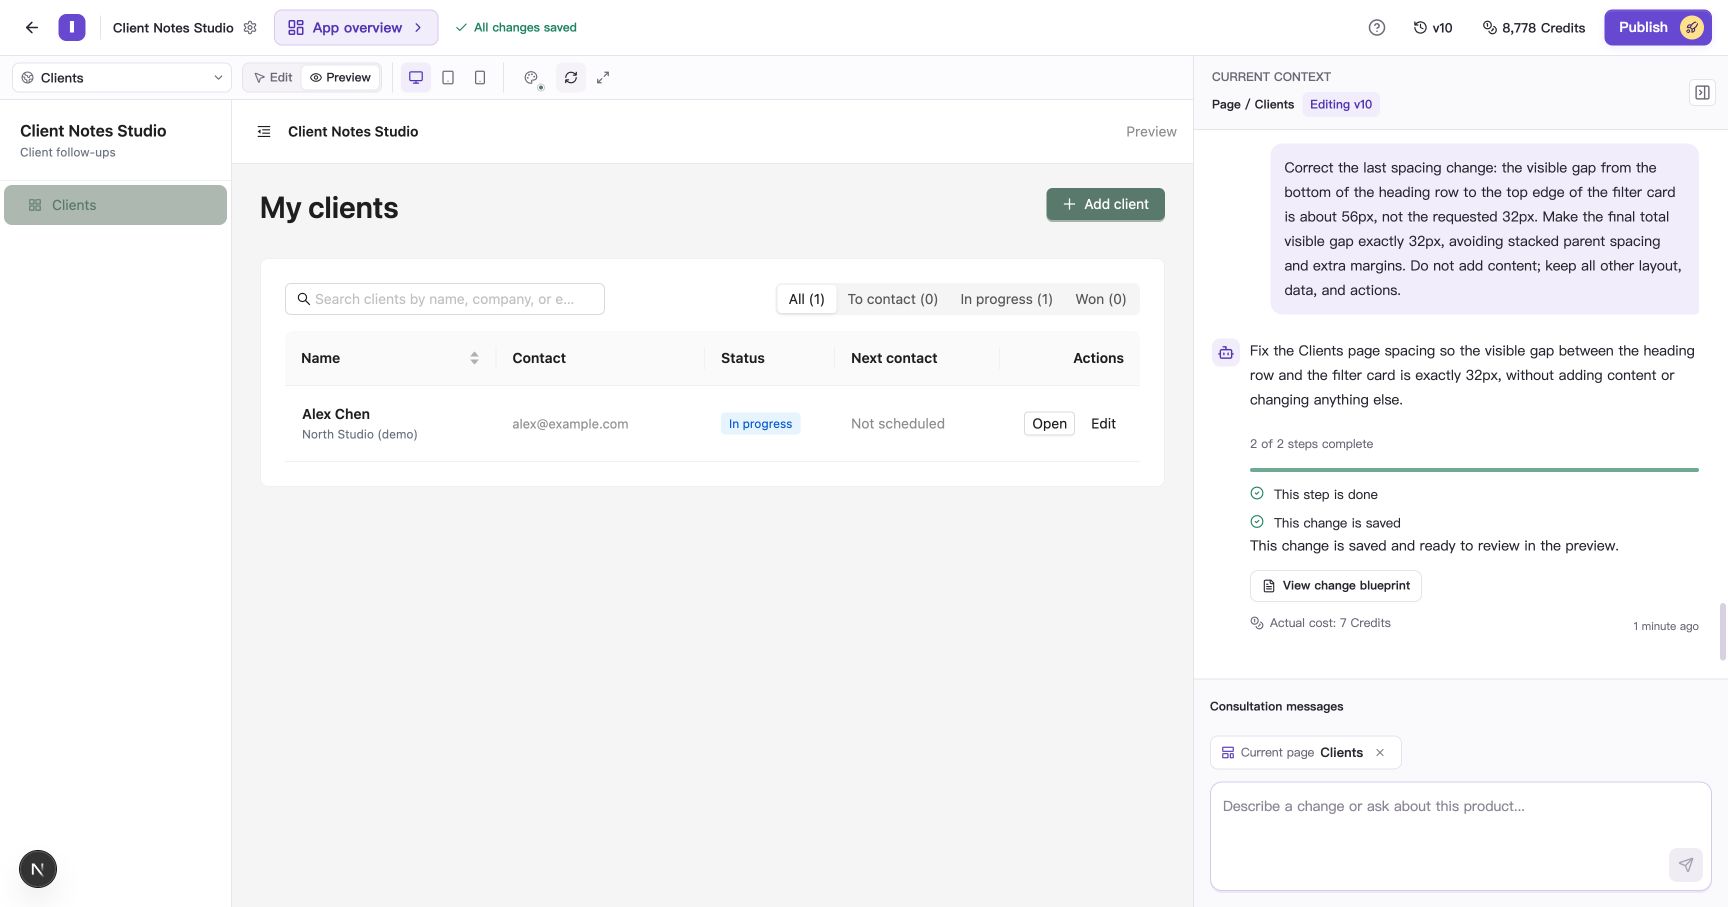
Describe the specific position and effect to adjust, then check the preview against your goal.
Publish again when you are ready for live visitors to see the changes. See Restore versions and publish your app.
Discard an unwanted plan
- Find an unexecuted plan that still shows its action buttons.
- Choose Discard plan.
- Check that the card says This plan was discarded and will not run and no longer offers execution.
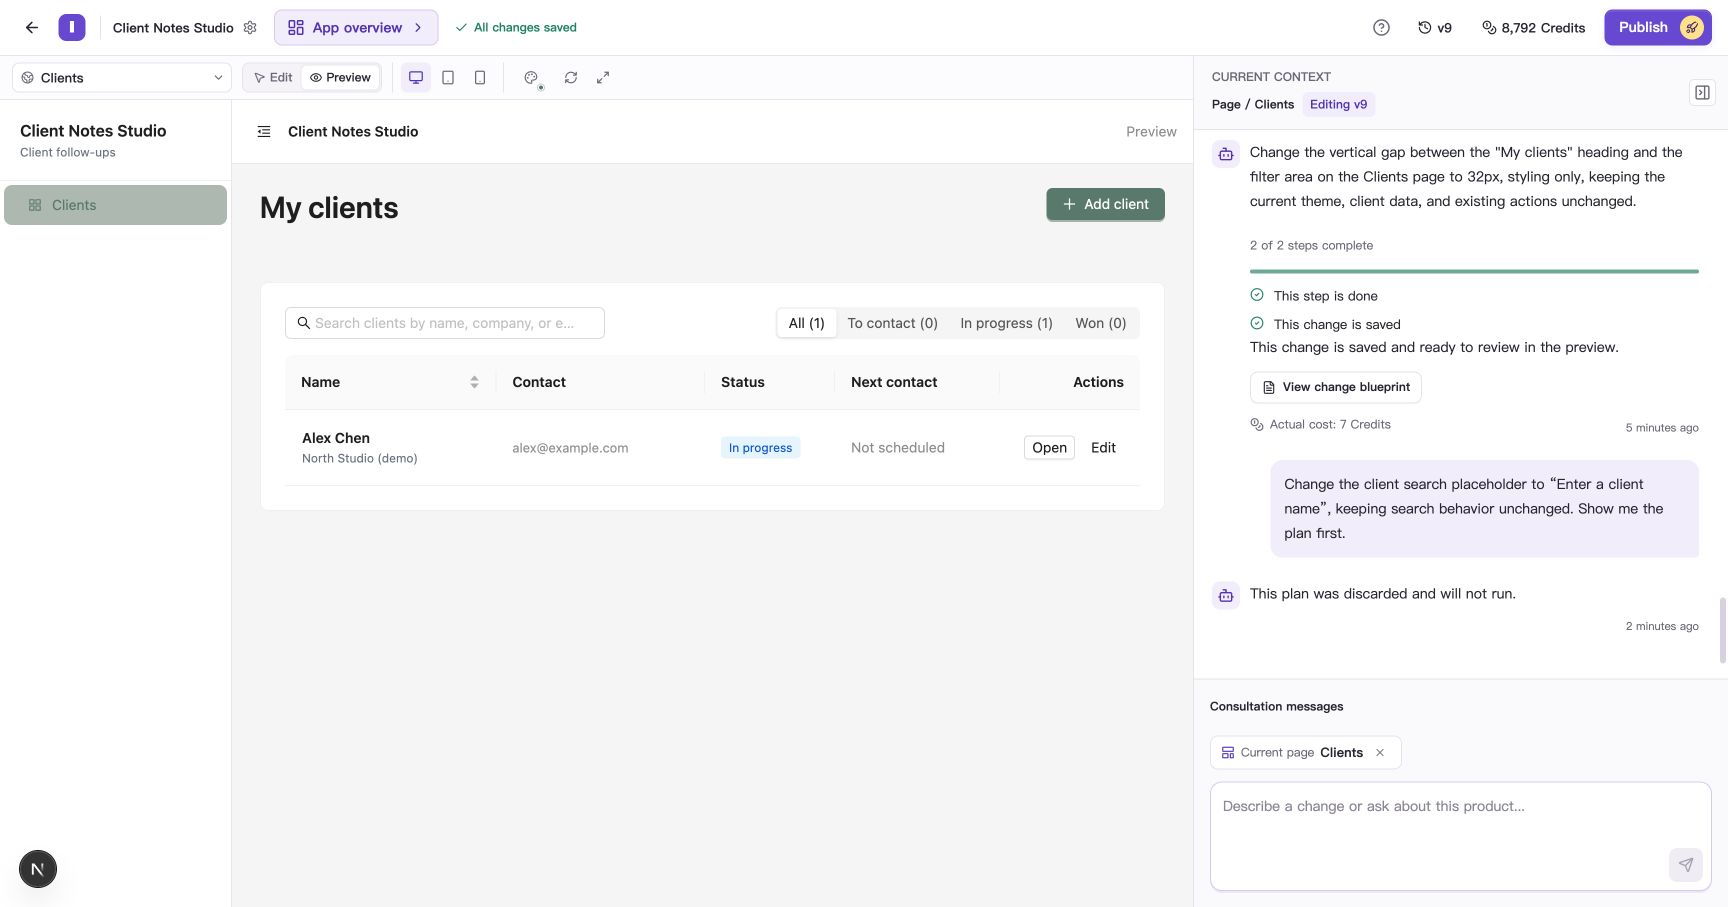
The plan is discarded, with the conversation record and current app version retained.
If execution has started, use the task card to stop it. If the change has already been saved, use Version history to preview and restore earlier work.
Common questions
How is usage calculated after discarding a plan?
Creating a plan uses Credits. Those Credits remain charged after you discard the plan. You can view the amount in usage records.