Understand IdeaMade and the app creation process
On this page
IdeaMade helps you create and change apps using natural language. You describe what you need, try the results, and decide when to publish. AI generates the app, with progress and results shown in the Builder workspace.
If this is your first visit, read through the process below, then follow Create your first app for a practical walkthrough.
Start with a clear purpose
Choose a task you know, such as following up with clients, managing event registrations, or organizing your books. Explain who will use the app, what information it needs, and what people should be able to do.
For “Client Notes,” the first version could focus on adding clients, recording follow-ups, and finding client records. Pages, forms, and data support that purpose. Add further requirements after trying the first version.
Understand Blueprints, app versions, and the live app
| Term | What it means | What you do |
|---|---|---|
| Product Blueprint | A description of the product’s goals, users, pages, data, and workflows | Check the AI’s understanding and refine the requirements. |
| Builder workspace | The workspace for generating, trying, and changing an app | Follow progress, request changes, and review results. |
| App version | A saved result of work on the app | Preview, compare, or restore saved work. |
| Preview | A way to view and interact with the app in Builder | Check features and the interface using test data. |
| Live app | The app users access at its public address after a successful publication | Make it available to users and publish updates when ready. |
Step one: Shape your Product Blueprint
You can start from Create a Blueprint on the website, describe your idea, and review the Blueprint without signing in. If you are already in Builder, select New Project on the projects page.
Review the purpose, pages, data, and workflows. Answer clarification questions, edit the Blueprint directly, or ask AI to propose an adjustment for you to confirm.
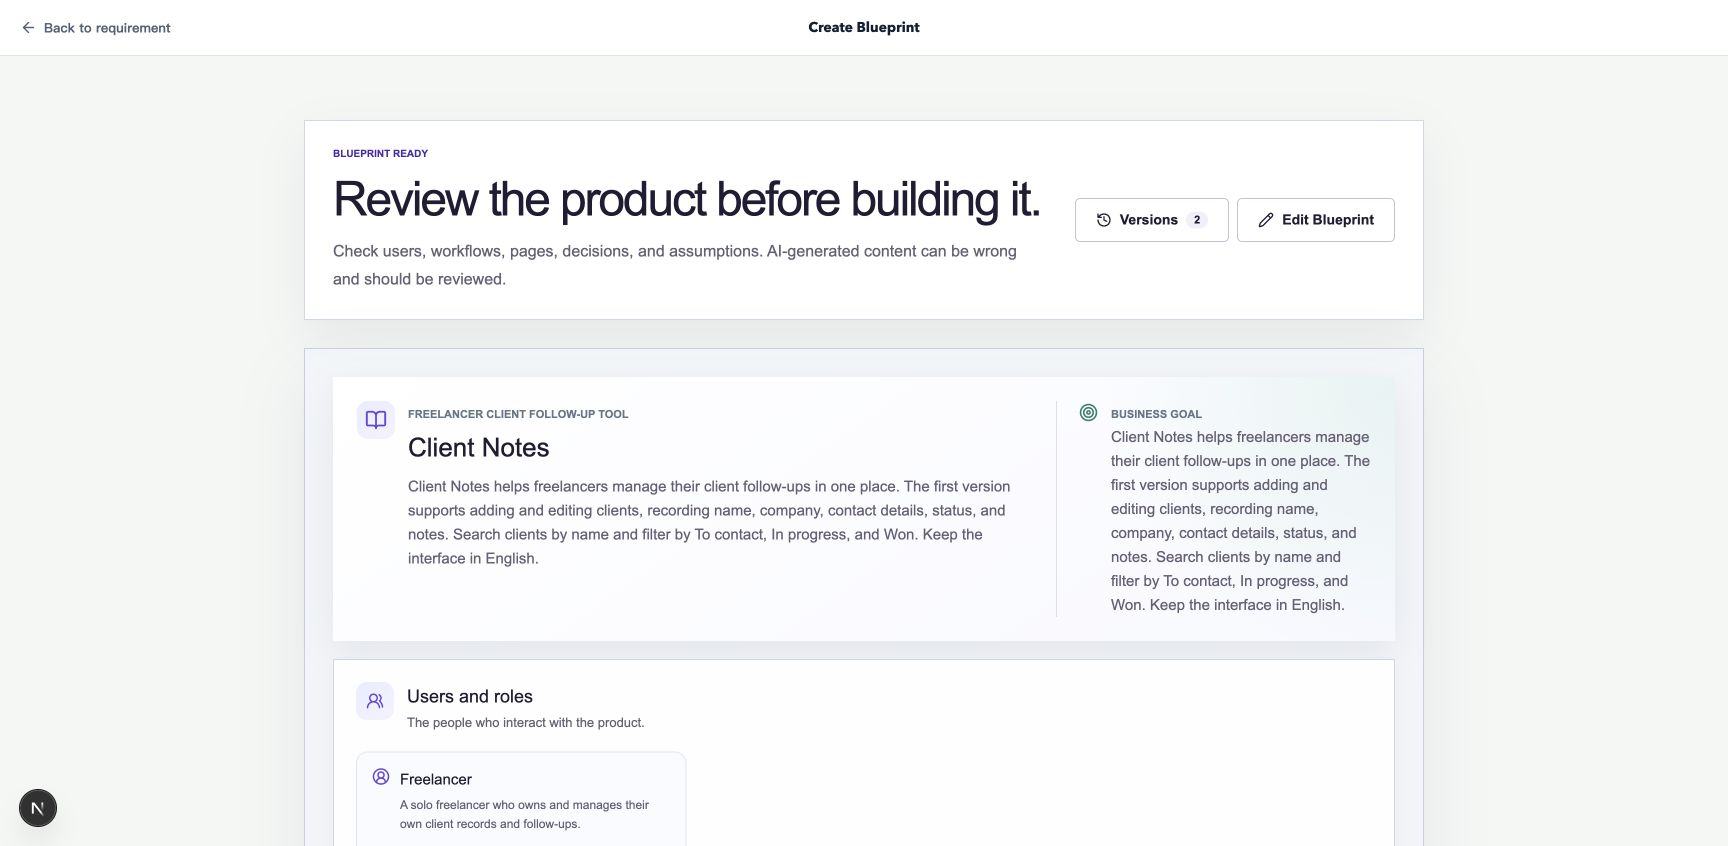
Check that the product purpose, pages, and core workflows match your intent.
Step two: Generate and try the first version
When you are ready to build, select Use this Blueprint in Builder. If you are not signed in, follow Sign up, sign in, and verify your email, then continue the creation flow.
Continuing from the Blueprint into Builder starts the first generation and uses Credits.
Once the result is saved, complete a core action in Preview. For example, add a fictional client, change their follow-up status, and search for the record. Check the data and behavior as well as the appearance.
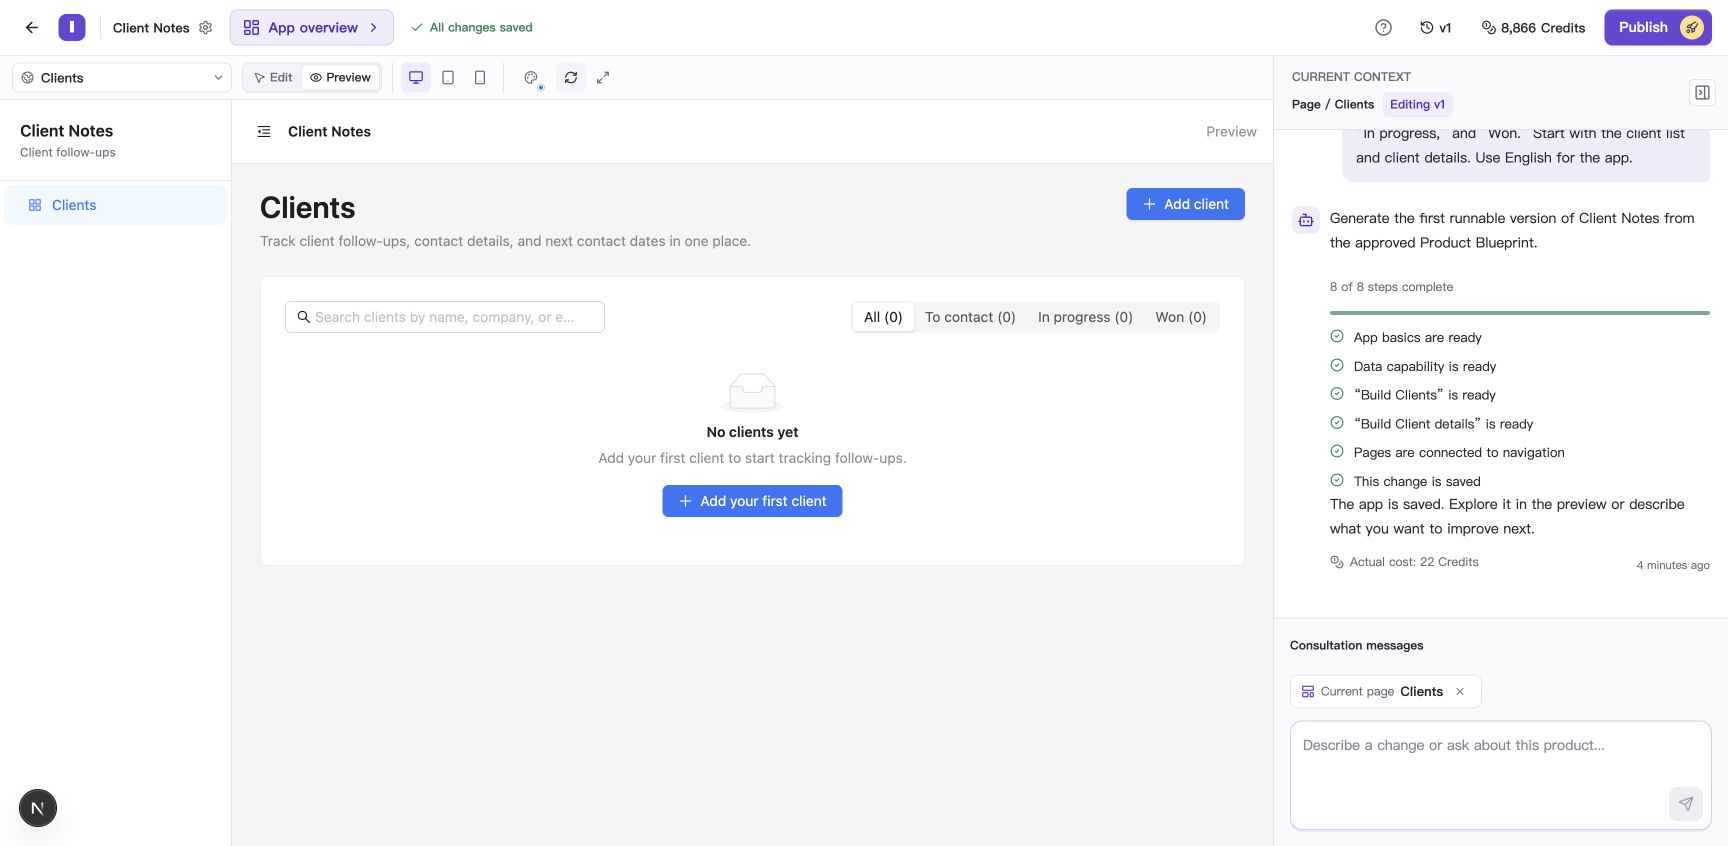
The first version is saved: v1 appears at the top, the result is on the right, and the app preview is on the left.
If the result is saved as a draft or a task needs attention, read the explanation before using the relevant continue or retry action. See Create your first app for details.
Step three: Request changes based on the result
In the conversation on the right, explain where to make the change, the result you want, and what should stay the same. For example:
The client details page feels crowded. Separate basic details and follow-up records into two areas, keeping the existing fields and actions.
Regular feature changes provide a plan to review before applying it. A local edit to an explicitly selected component can run directly. After the result is saved, check the change in Preview.
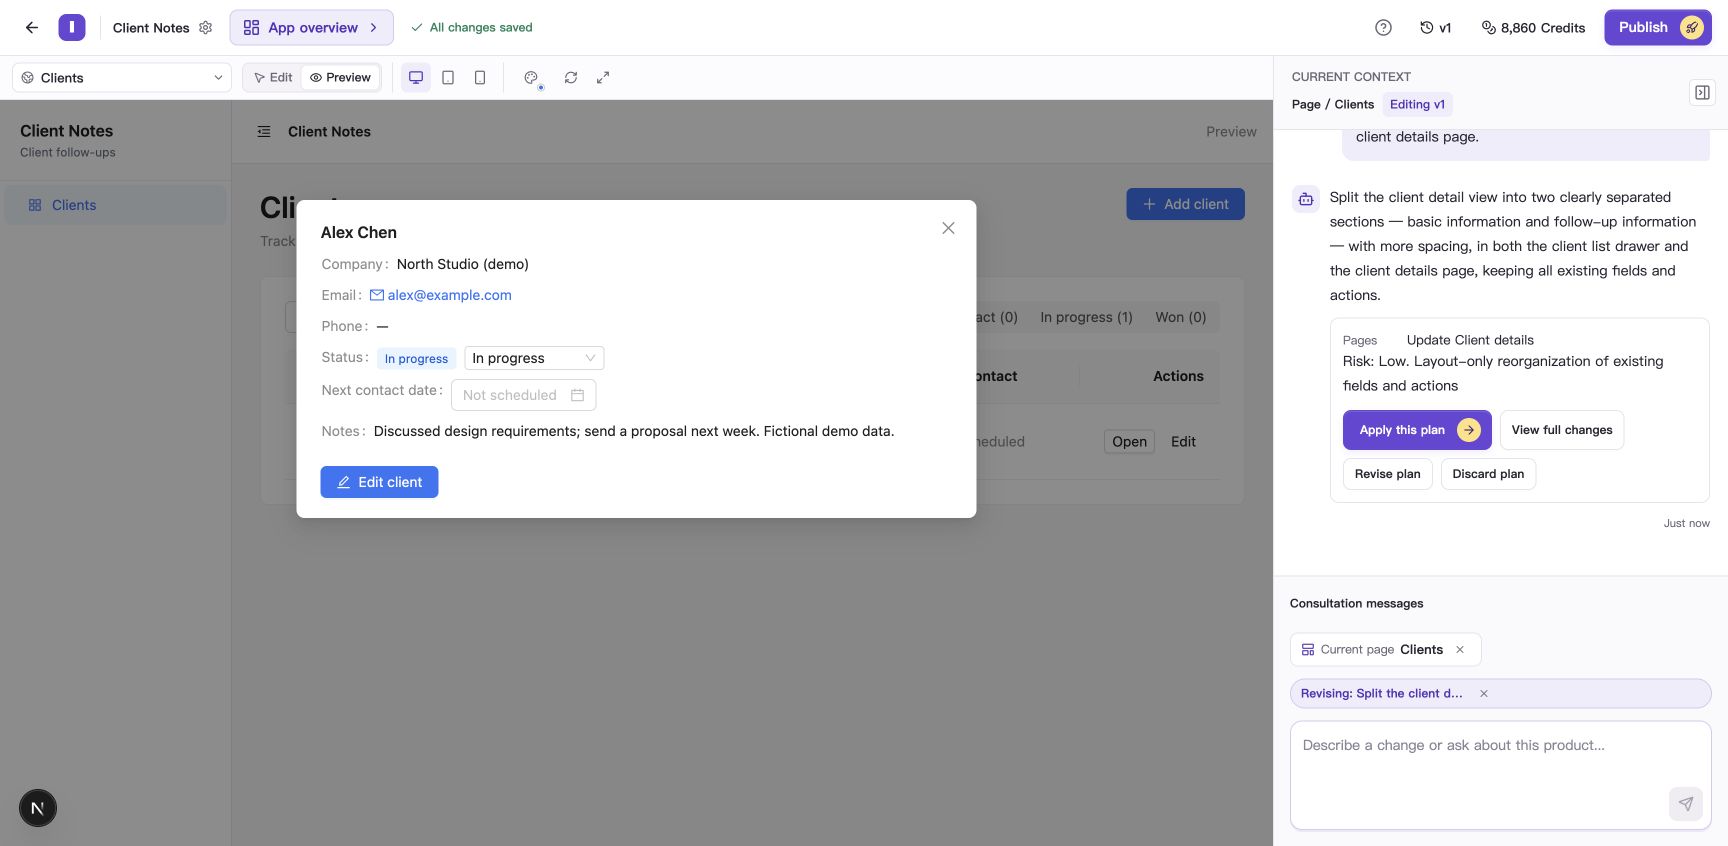
The plan card provides controls to view details, revise, apply, or discard the plan.
To return to earlier work, preview a version in version history, then restore it as the current editing version. See Restore versions and publish your app for the steps, or Request changes to your app for more request examples.
Step four: Publish for your users
Once the key actions meet your expectations, select Publish at the top of Builder. Check the publication target and wait for release checks and deployment to finish. When the target version is shown as Live, select Open app to check the public address.
After publication, users can open the app at its live address. Try later changes in preview, then publish updates when ready.
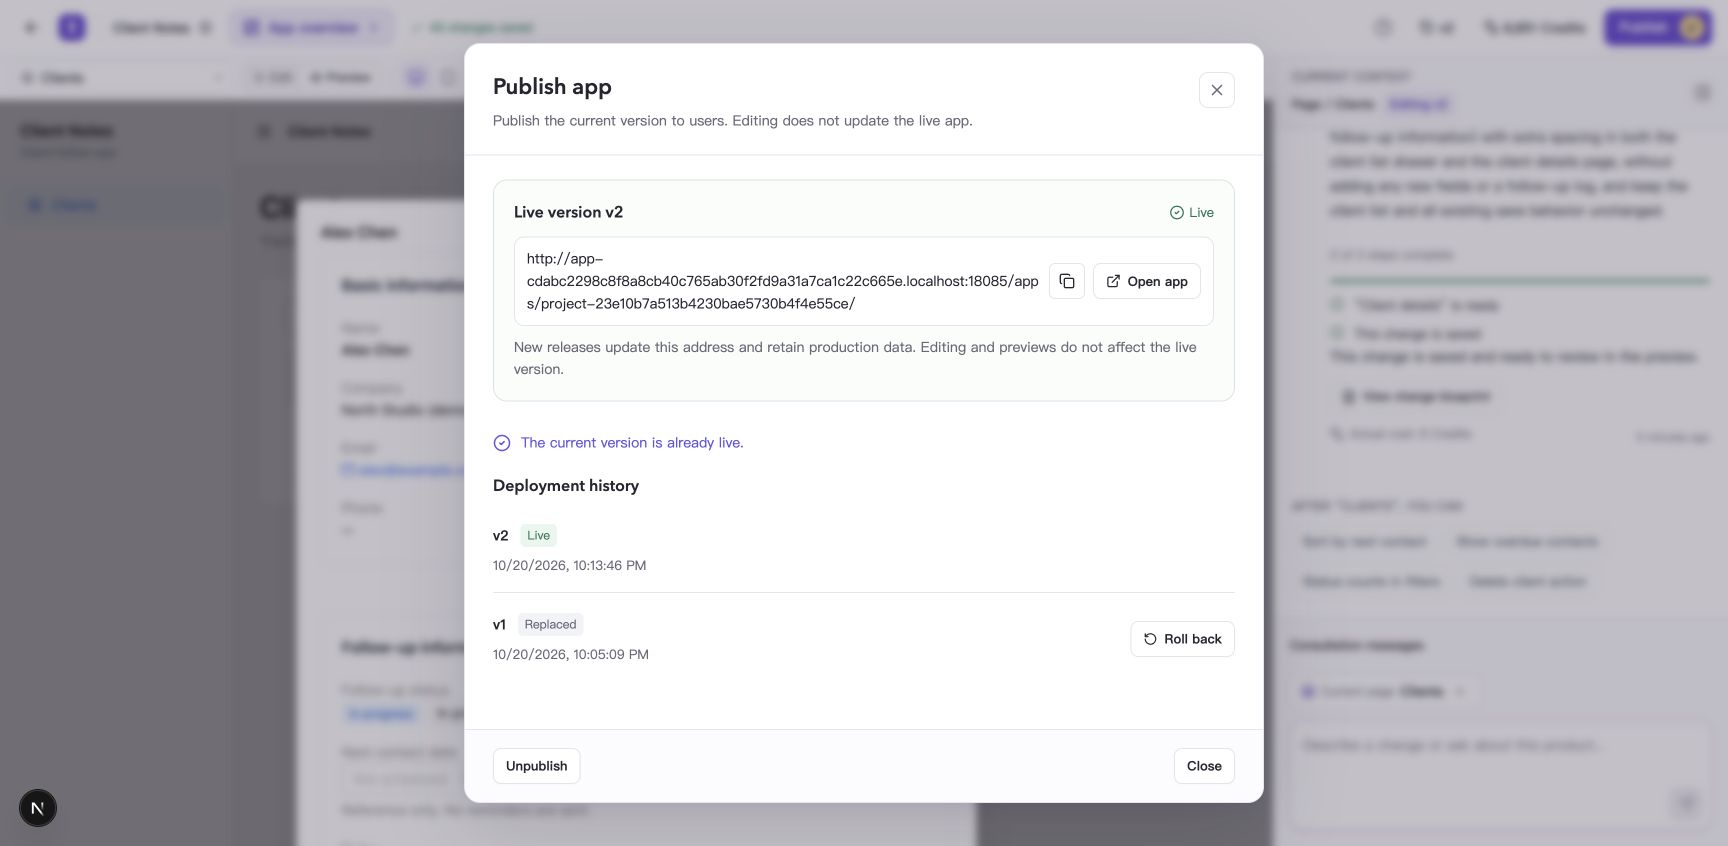
After publishing completes, the dialog shows live v2 and the app link.
See Restore versions and publish your app for the full steps.
What to prepare
- A clear app purpose and the most important actions for its first version.
- An email address that can receive confirmation messages. You need to sign in before generating the app.
- A desktop computer for Builder and fictional data for trying the app.
- Available Credits for generating and changing your app.
For a first walkthrough, follow Create your first app. If you have already opened a project, read Find your way around Builder.
Common questions
Can I request something that was not in the Blueprint?
Yes. Describe the new goal and related pages, data, and rules in Builder. Read the response or change plan, then check the actual result. If the feature uses an external service, complete its account and service setup as well.