
Choose a page or component to change
On this page
Selecting a page tells AI where you are working. Selecting a component identifies a specific element to change. You can left-click an element and describe the change in the AI conversation, right-click it and use the pop-up editor, or choose Delete component directly.
Before you start
Open a project with a generated app and check that you are viewing the current editing version. Historical versions are read-only. To continue from one, follow Restore versions and publish your app first.
The examples use Client Notes. They update the new-client button, change the page heading, and remove its introductory text. Component edits use Credits.
Open the right page
- Use Select page at the top left of the canvas to open the target page.
- Check the Current page label above the AI composer.
- If the page needs a specific record, such as a client details page, switch to Preview and open a client from the list before locating the element.
When you only select a page, describe the location and scope of your change. Clear an unrelated component selection before requesting changes across a page or several pages. See Request changes to your app for the usual review flow.
Option one: left-click and use the AI conversation
- Switch the canvas to Edit.
- Left-click the target component. Check its highlight and the Editing · Component label above the composer.
- Describe the change and select Send request. For example:
Change this button’s text to “Add client”. Keep its behavior of opening the new client form.
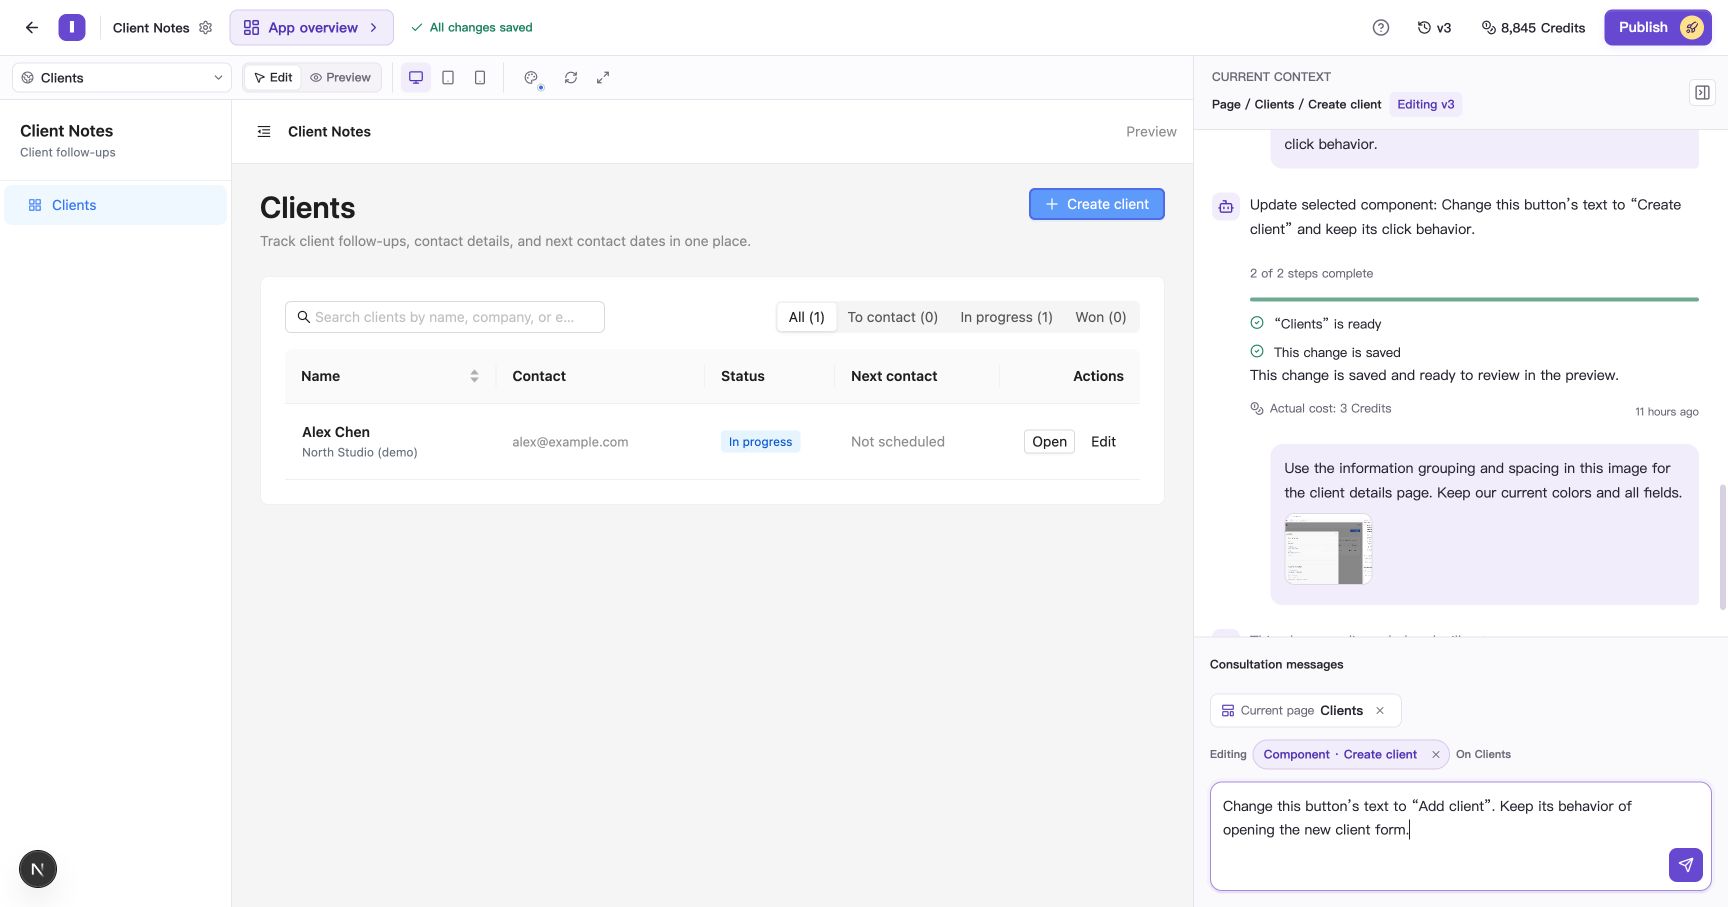
The selected button appears above the composer. Check it, then send the request to change its label.
- Wait for the change to be saved as a new version.
- Switch to Preview, check the new label, and click the button to test its existing behavior.
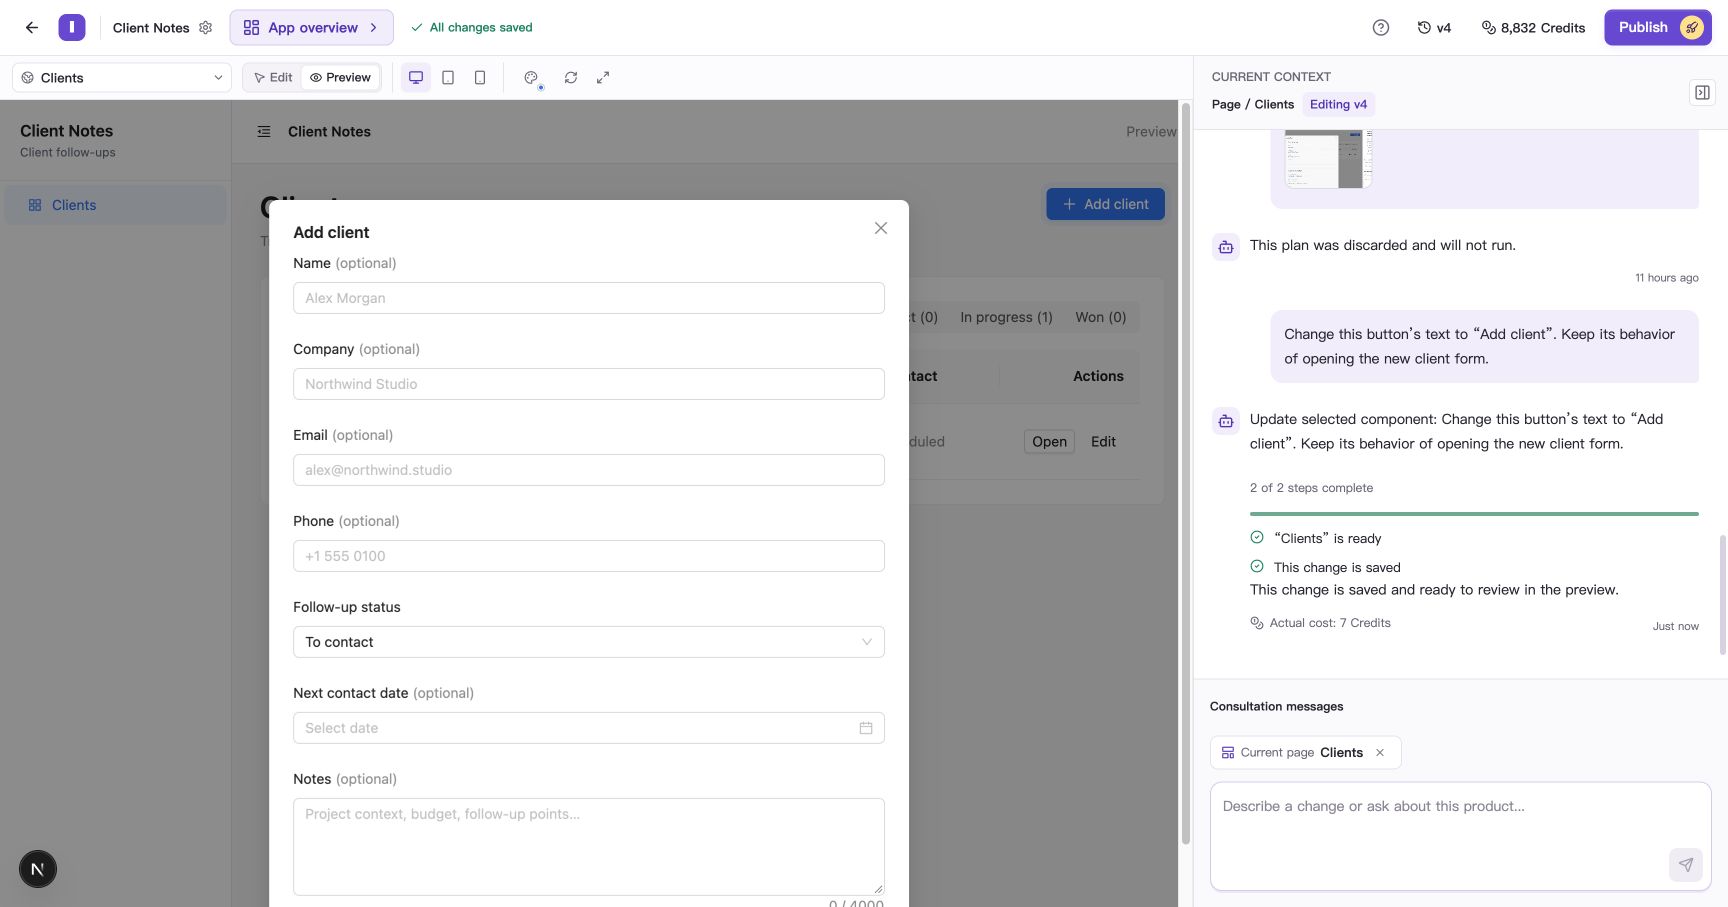
The label changed, and the new-client form still opens.
If you selected the wrong element, choose Clear beside the component label, then select again.
Option two: right-click and use the pop-up editor
- Right-click the target component. You can do this in Preview mode; opening the component menu switches the canvas to Edit.
- Check the component name and highlight, then choose Edit component.
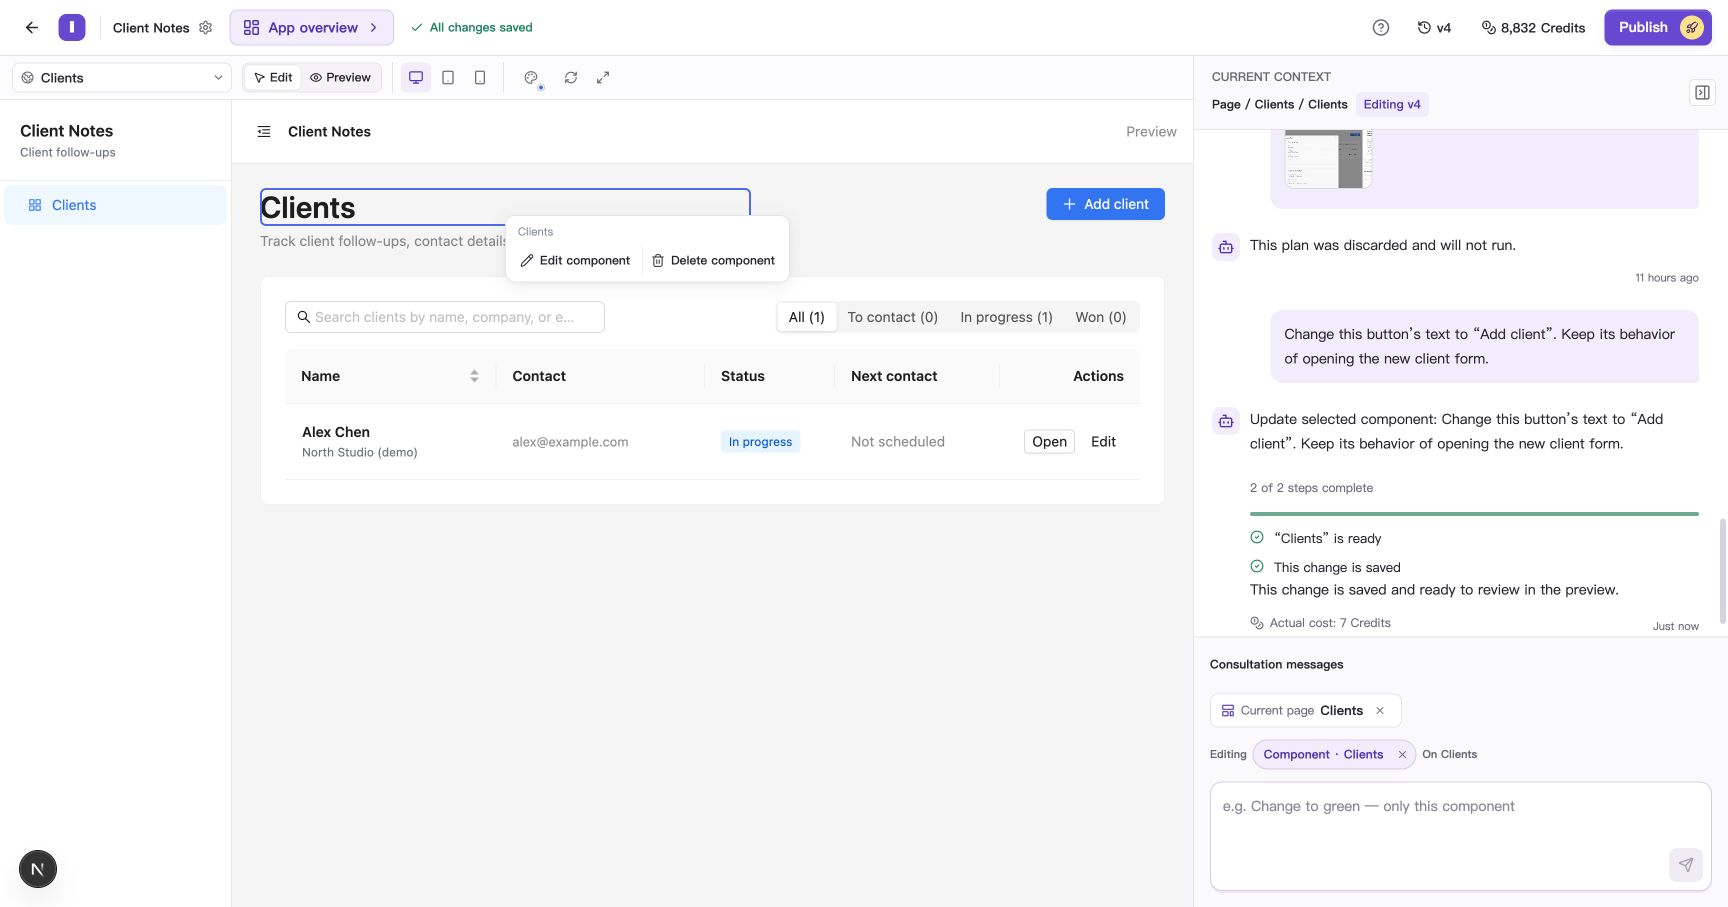
The context menu shows the selected component’s name and its edit and delete actions.
- Enter a request such as “Change this heading to ‘My clients’. Keep the navigation label and all other content unchanged.”
- Click the arrow labeled Apply component edit, or press Enter when your request is ready.
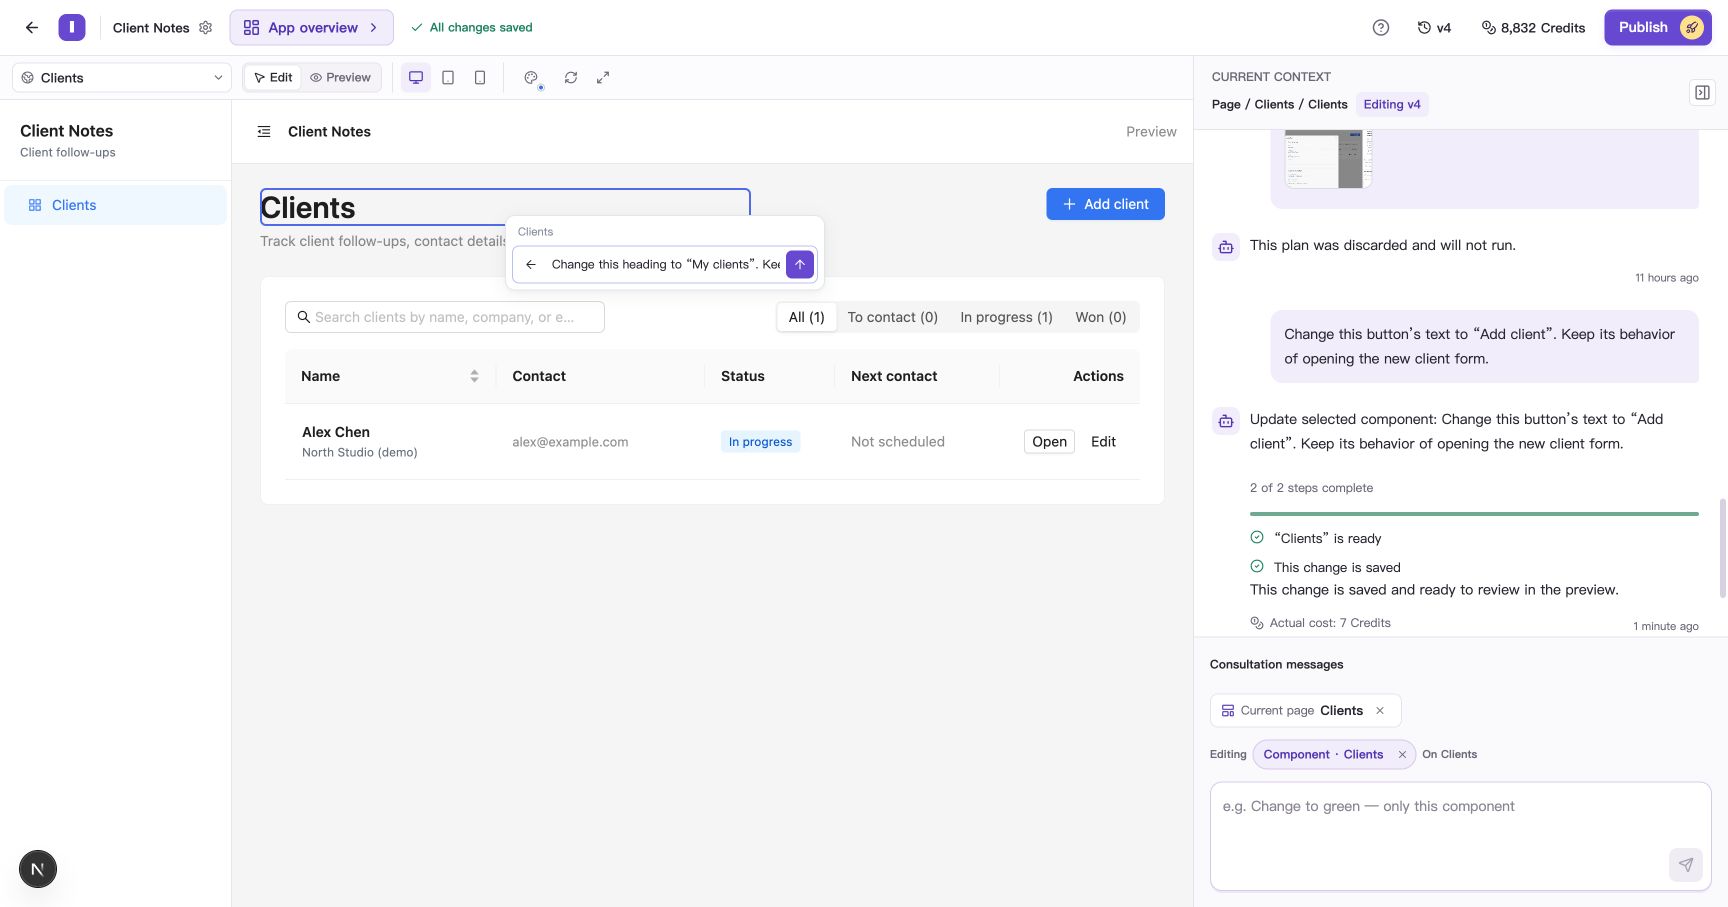
Write the request in the pop-up, then click the arrow or press Enter to submit it.
- Wait for the task to save, then return to Preview and check the heading and surrounding content.
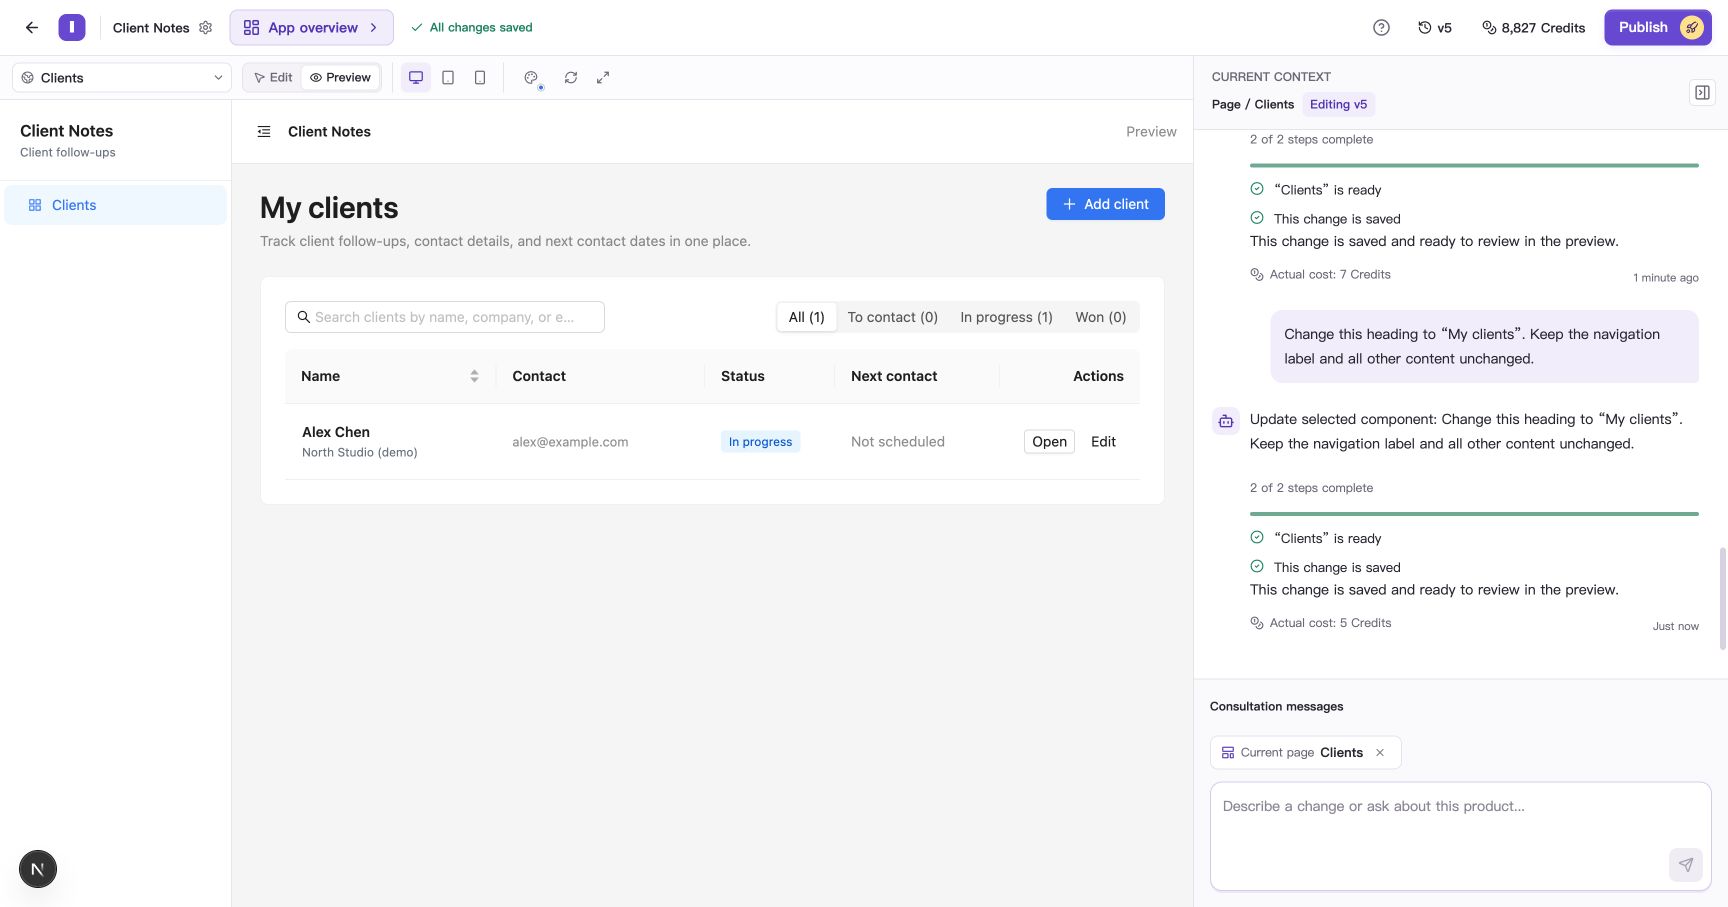
Only the page heading changed in this example; the navigation label stayed the same.
Option three: delete a component directly
- Right-click the element you want to remove.
- Check the highlight and menu label, then choose Delete component to start the deletion task.
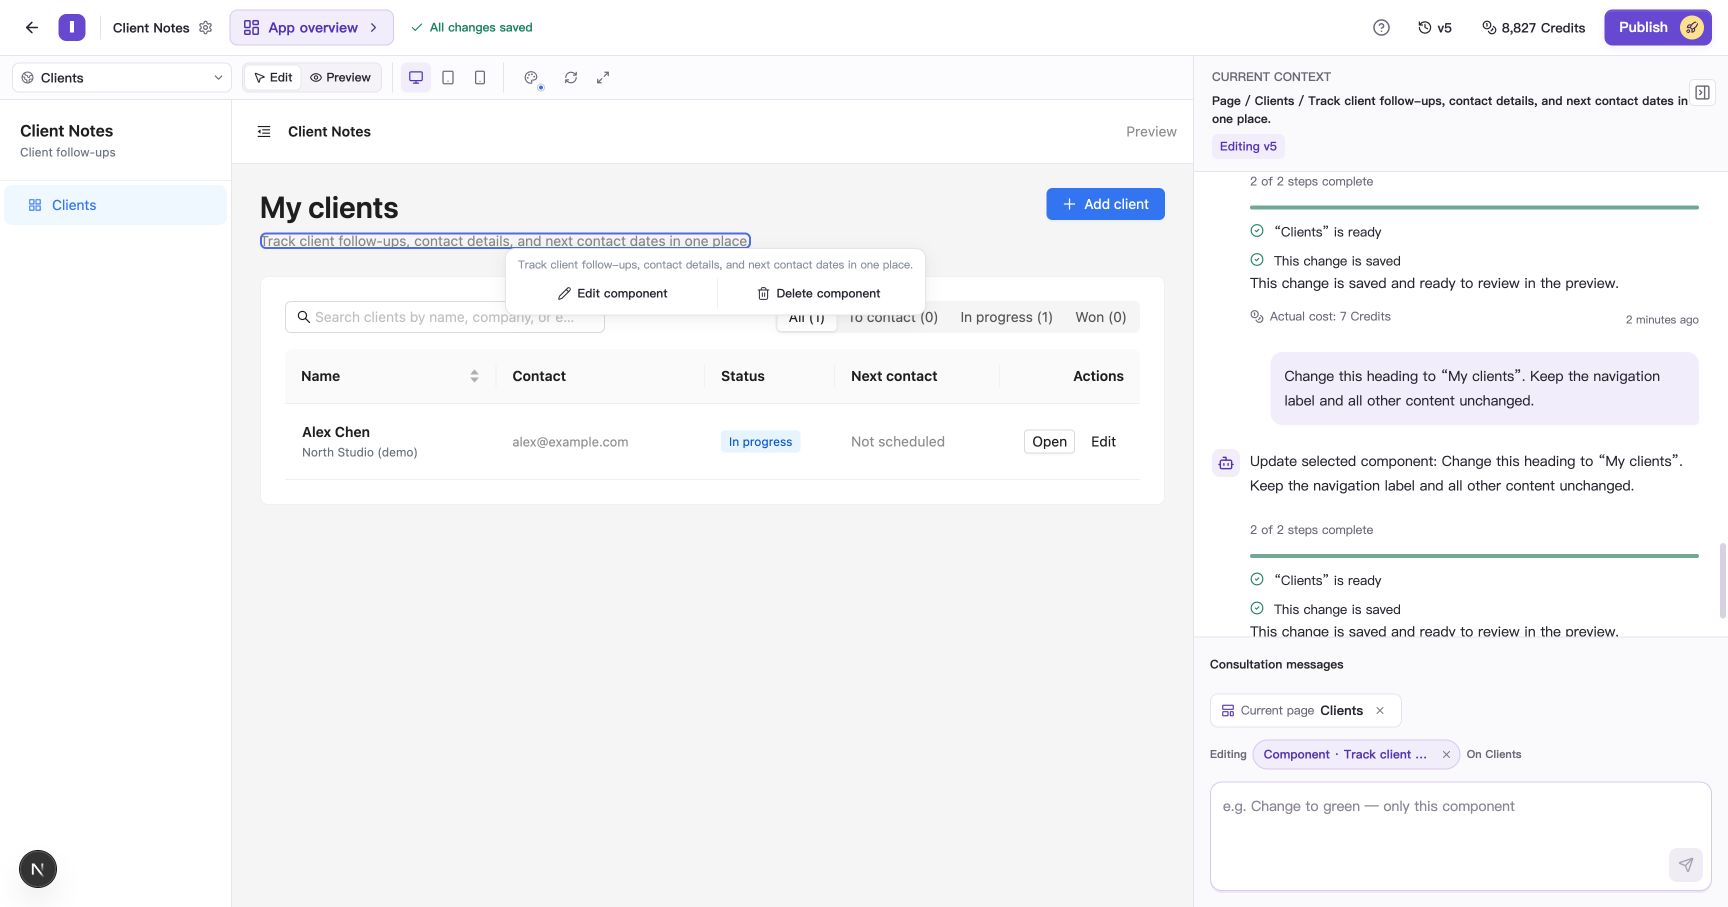
This example selects the introductory text below the heading. Choose Delete component to remove it.
- After the new version is saved, switch to Preview and check that the element is gone and nearby actions still work.
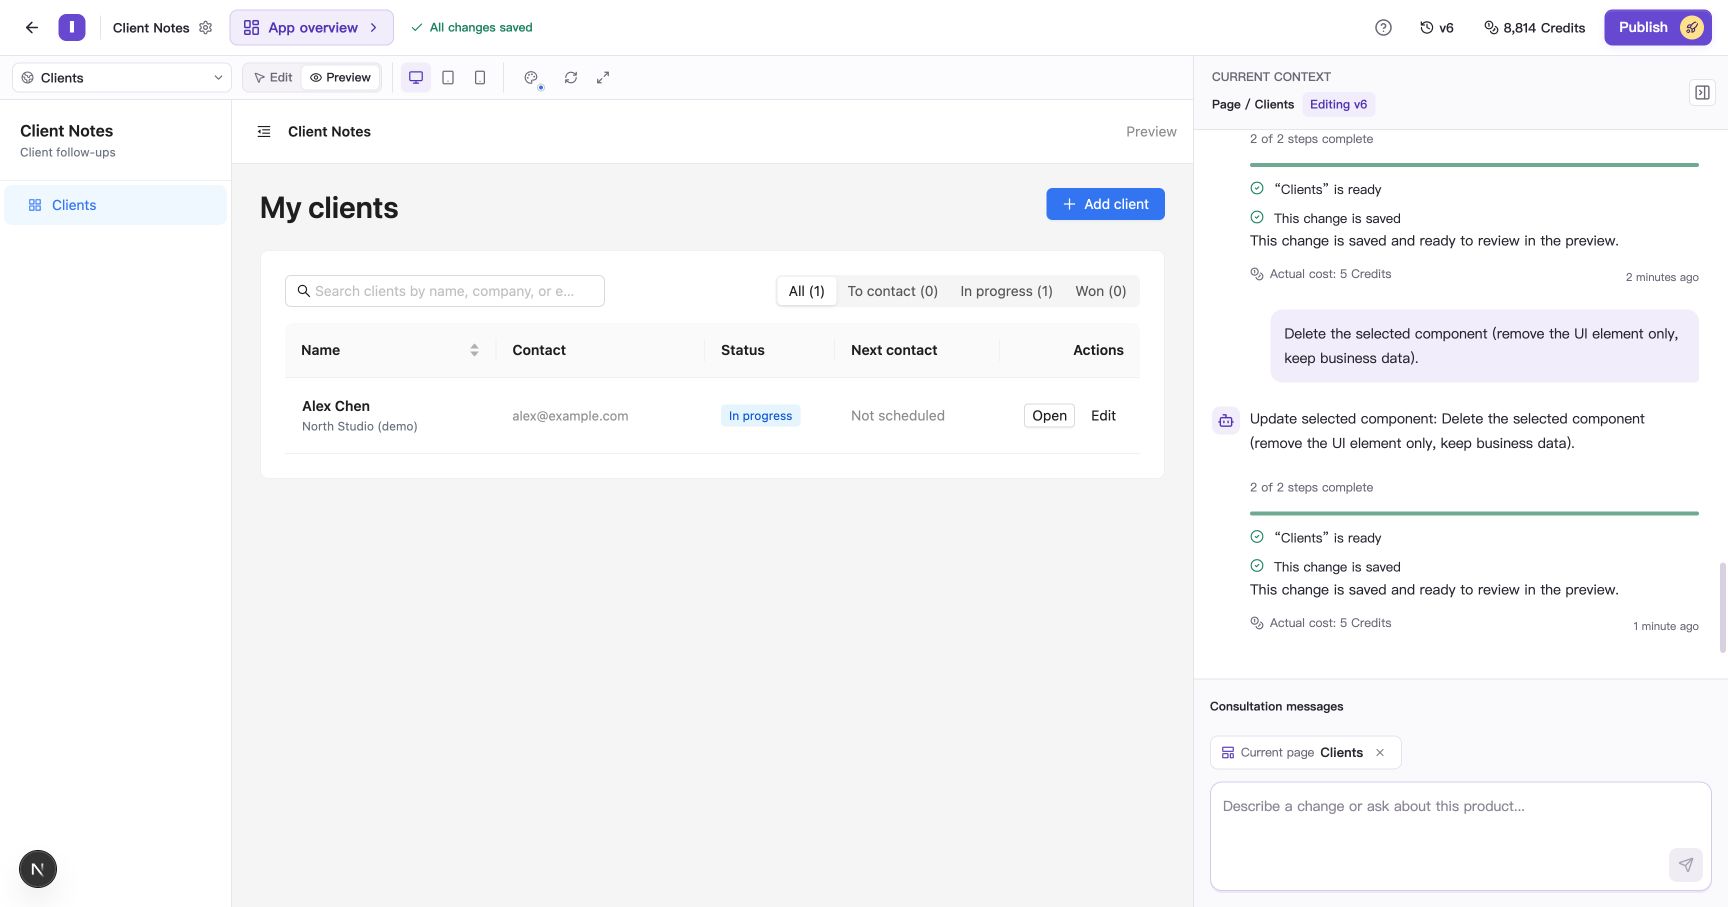
The new version has removed the introductory text below the heading.
If you remove the wrong element, preview the app version before the deletion and decide whether to restore it. See Restore versions and publish your app.
Check the scope and result
Similar elements may appear separately in a list, drawer, and details page. Check the entry point you intended to change. For coordinated changes across these views, clear the component selection and describe the relationship in a normal request.
If a saved version has not appeared in the preview, use Refresh in the canvas toolbar and check again. An app that is already live needs to be published again before visitors see the new editing version.
Common questions
Why does clicking the button select it instead of opening a form?
Check the canvas mode. Edit uses clicks to select components; Preview runs the app’s normal interactions.